
Connect with Launch Buttons
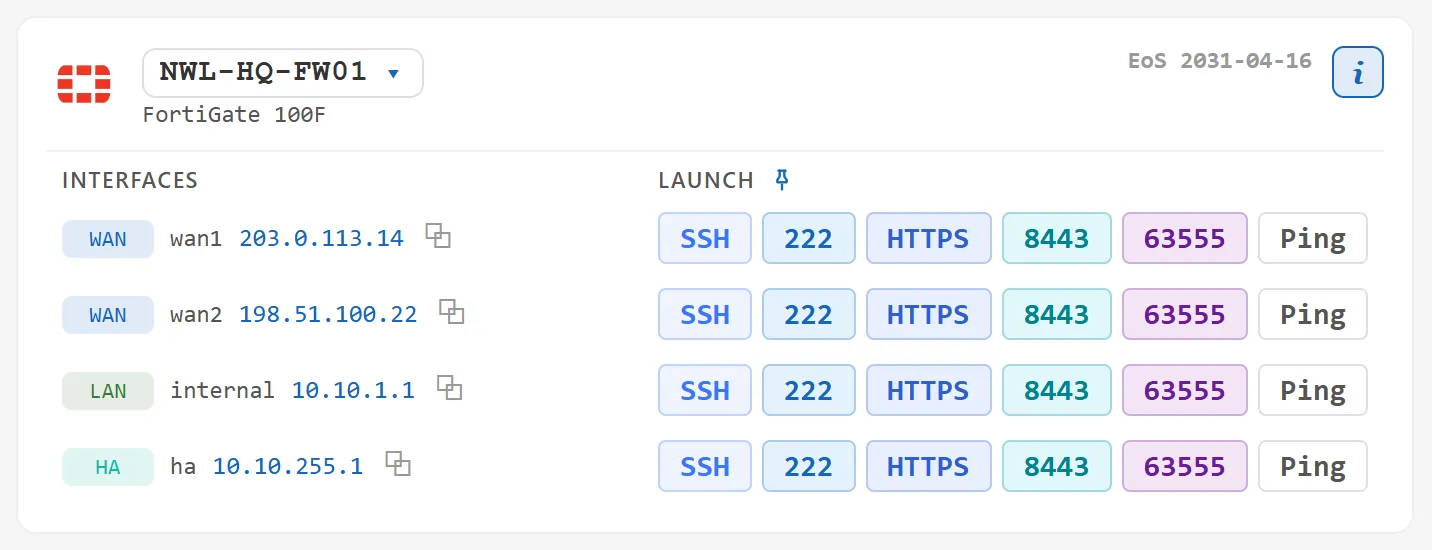
Launch Buttons are the colored protocol and port shortcuts on every device, such as SSH, HTTPS or 8443. One click connects to the device’s selected IP address. Older versions called them “Quick Connect Buttons”.
You set them once at the level that fits, and every device below inherits them. A device that needs something different gets its own set.
Where Launch Buttons appear
Section titled “Where Launch Buttons appear”- On the device card in the Home tab. Each interface row has its own buttons plus Ping, so a click connects to that IP. The pin at the top of the launch column switches between always shown and shown on hover.
- In a device’s right-click menu in the sidebar, under CONNECT VIA. If the device has several IPs, pick one from the drop-down first.
- On the search result cards in global search (Ctrl+G) and on the new-tab screen.
Double-clicking a device in the sidebar connects to its active IP with its first SSH button.
What each protocol does
Section titled “What each protocol does”| Protocol | What happens |
|---|---|
ssh |
Opens a terminal tab inside ArkhiNet, using the bundled PuTTY plink. |
telnet |
Opens a terminal tab, also through plink. |
https, http |
Opens the address in your default browser. The port is left off when it is the default (443 or 80). |
rdp |
Starts Windows Remote Desktop (mstsc /v:host:port). The default port is 3389. |
Ping sits next to the Launch Buttons on every device. It runs a continuous ping -t in a terminal pane. If a session to that host is already open, the ping opens in a split below it.
Serial connections don’t use Launch Buttons. Open them from the quick-connect bar on the new-tab screen; see Quick connect and the new-tab screen.
If you set SSH, Telnet, Serial and Ping open in to External PuTTY (Settings, then Connections), SSH and Telnet buttons open a PuTTY window instead of a tab. See Connection options.
How inheritance works
Section titled “How inheritance works”ArkhiNet looks for buttons in this order and uses the first set it finds:
- The device’s own buttons.
- The site’s buttons.
- The client’s buttons.
- Your default buttons in Settings.
- The theme’s built-in set (SSH 22, 222, HTTPS 443, 8443, 63555).
Device, site and client buttons are saved in the data file, so everyone who shares it sees them. Your default buttons in Settings are saved on this computer only.
If you renamed your levels (for example to Company and Location), the editors use your names instead of “Client” and “Site”.
Set your default buttons
Section titled “Set your default buttons”These apply to every device that has nothing more specific.
- Click the gear icon, or press Ctrl+,, to open Settings.
- Click Connections and scroll to Launch buttons.
- Under Default launch buttons, click ✎ Edit on a button to change it, ✕ to remove it, or + Add Button to add one.
- Fill in Label (up to 8 characters), Port (1 to 65535) and Protocol, then click Save Changes or + Add Button.
Set buttons for a client
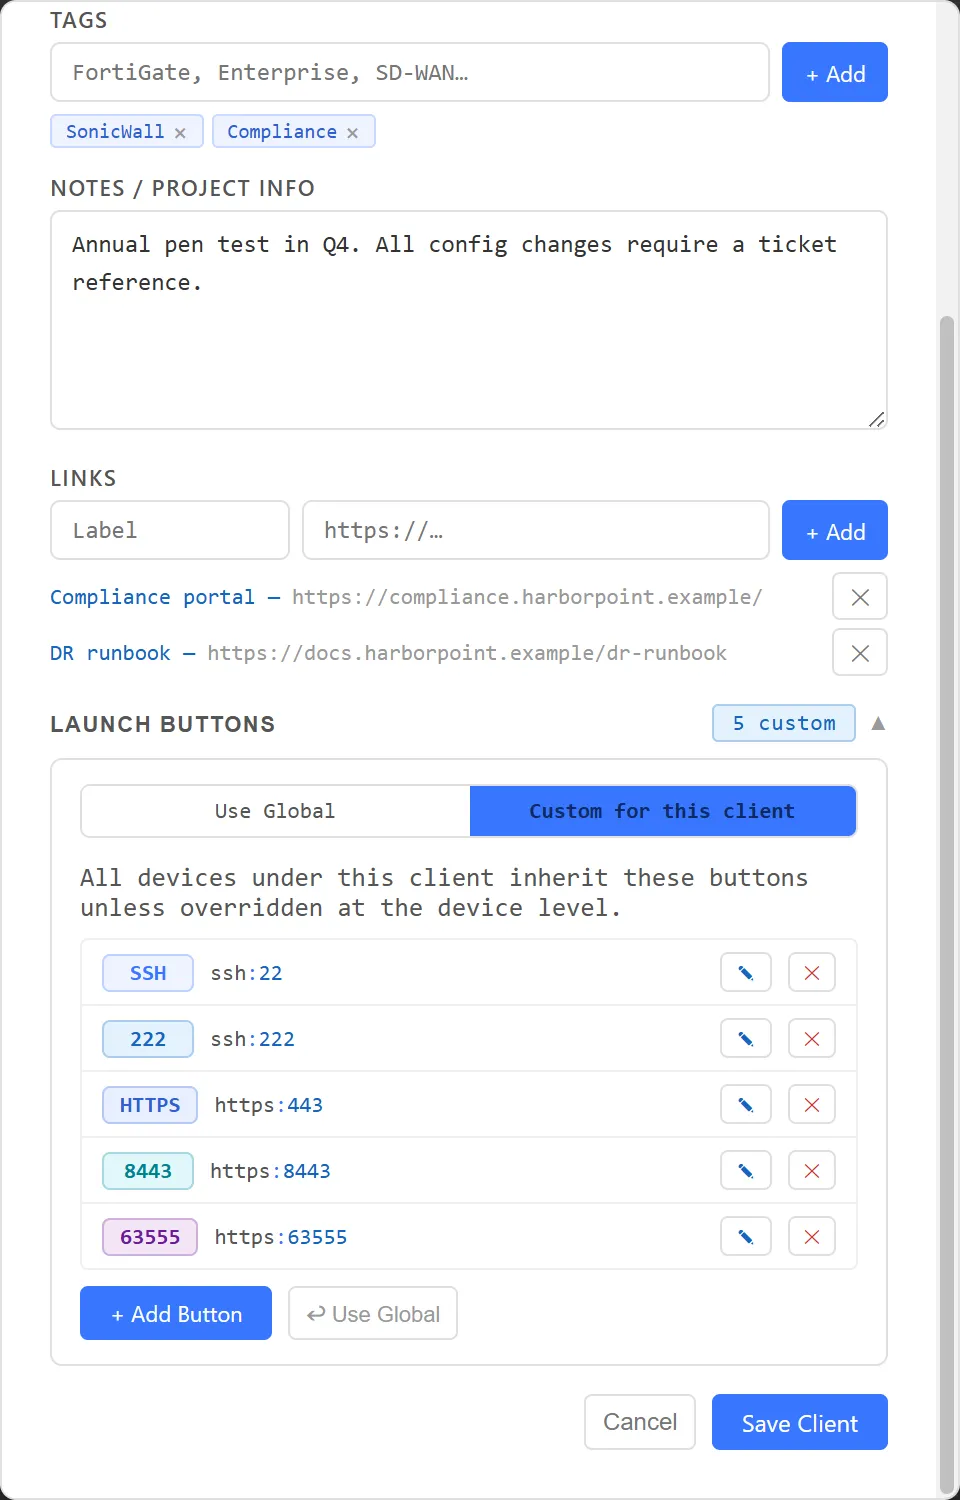
Section titled “Set buttons for a client”- In the sidebar, right-click the client, for example Harbor Point Financial, and click Edit.
- Click LAUNCH BUTTONS to expand the section.
- Click Custom for this client. The editor starts with a copy of your default buttons.
- Edit, remove or add buttons with ✎, ✕ and + Add Button.
- Click Save Client.
Set buttons for a site
Section titled “Set buttons for a site”- In the sidebar, right-click the site, for example Downtown Office, and click Edit.
- Expand LAUNCH BUTTONS and click Custom for this site.
- Change the buttons and click Save Site.
If a client has only one site, the site row is hidden in the sidebar. Right-click the client and choose Edit site “name”… instead, for example Edit site “Main Office”… on Summit Legal Partners.
Override buttons on one device
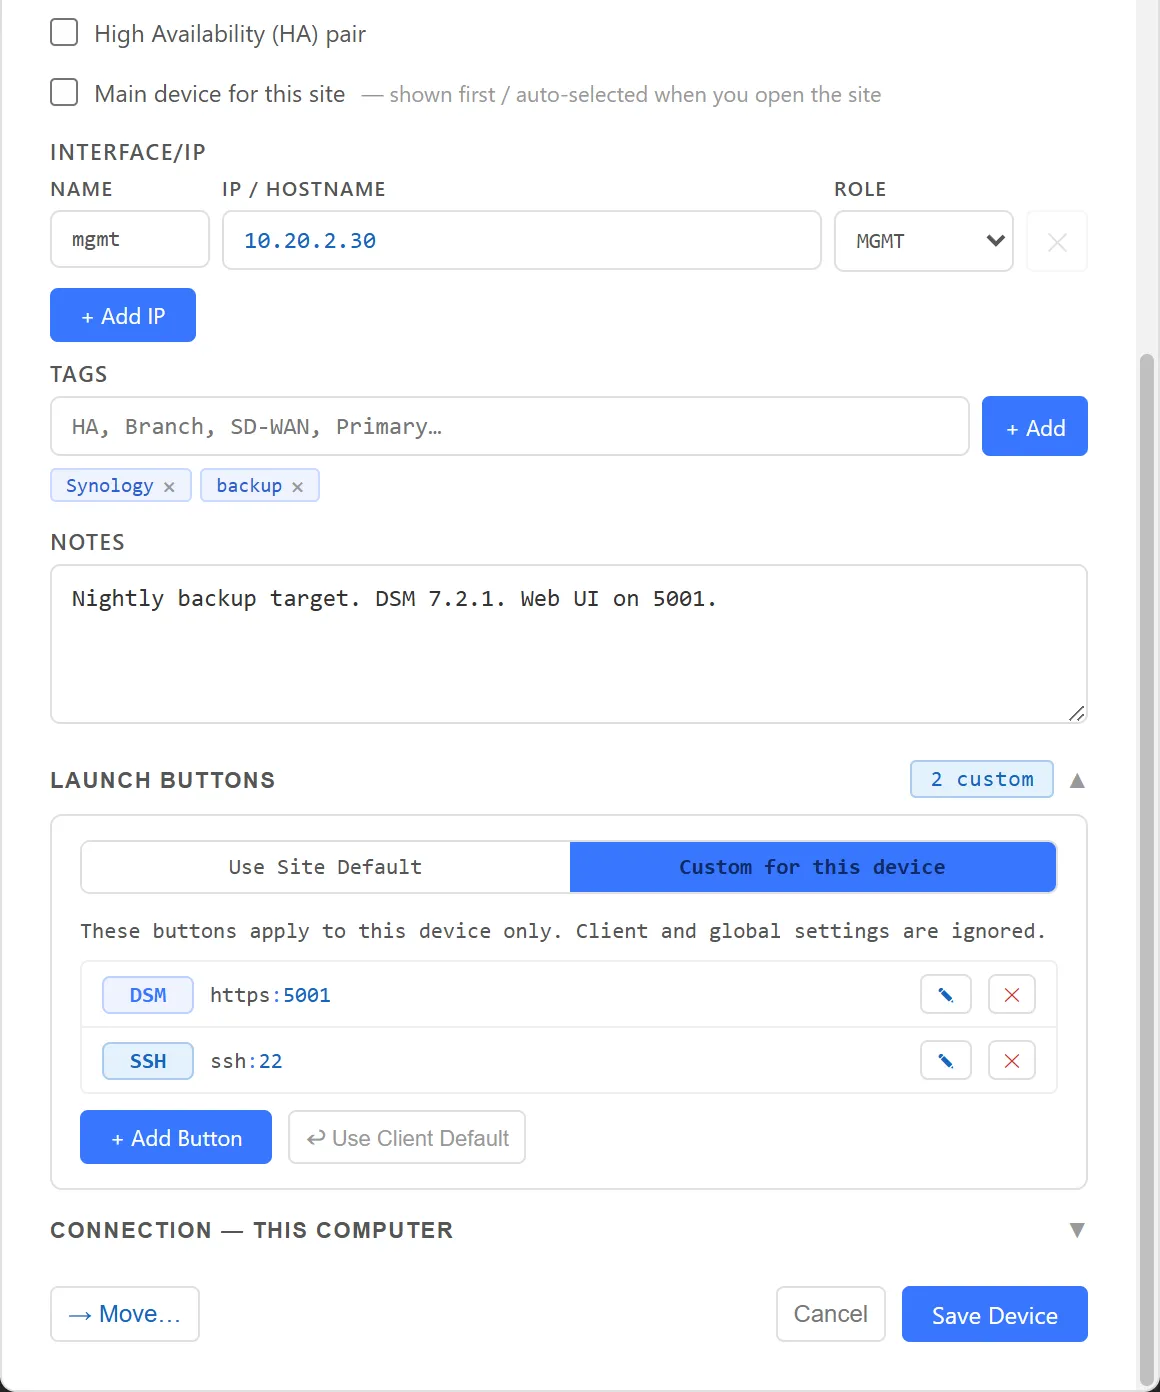
Section titled “Override buttons on one device”Use this for a device with a non-standard admin port, such as a NAS whose web interface runs on 5001.
- In the sidebar, right-click the device, for example NWL-TAC-NAS01, and click Edit.
- Expand LAUNCH BUTTONS and click Custom for this device.
- Click + Add Button, enter the label, port and protocol, and click + Add.
- Click Save Device.
Go back to inherited buttons
Section titled “Go back to inherited buttons”Open the same editor and click the Use … option at the top of LAUNCH BUTTONS (Use Global for a client, Use Client Default for a site, Use Site Default for a device), then save. The custom set is removed and the level inherits again.
The badge next to LAUNCH BUTTONS shows what’s in effect: “n custom” or the inherited level and its button count.