
Copy one file with Quick transfer
Quick transfer copies one file to or from a device with the bundled pscp (the same PuTTY release ArkhiNet uses for SSH). Use it for the jobs network gear needs: pulling a FortiGate config backup, uploading firmware, or grabbing a Cisco running-config. It was called Transfer file… before 4.7.0.
For browsing folders on a Linux server or NAS, use the File Transfer tab instead.
When to use SCP
Section titled “When to use SCP”- FortiGate: FortiGates don’t offer SFTP, so SCP is the one that works. FortiOS also needs
admin-scp enablebefore it serves files. - Cisco IOS: the device’s file server is SCP. It needs
ip scp server enable. - Anything else: leave the protocol on Auto (SFTP, then SCP), which tries SFTP first and falls back to SCP.
ArkhiNet picks the default from the device’s Model field: SCP for Fortinet and Cisco models, Auto for everything else. You can change it per transfer.
Download a config backup
Section titled “Download a config backup”- In the sidebar, right-click the device, for example NWL-HQ-FW01 under Northwind Logistics, Seattle HQ.
- Click Quick transfer (SCP)…. The Transfer file dialog opens with ⇩ Download from device selected.
- Under FILE ON THE DEVICE, type the remote path, or click one of the hints below the field:
- FortiGate: Configuration backup (
sys_config), filled in for you. - Cisco: Running configuration (
system:running-config), Startup configuration (nvram:startup-config), or A file on flash: (add the file name afterflash:).
- FortiGate: Configuration backup (
- Under SAVE ON THIS COMPUTER AS, click Choose… and pick where to save. The suggested name is the device, the file and today’s date, for example
NWL-HQ-FW01_sys_config_2026-10-17.conf, so a folder of backups sorts by device, then date. - Check PROTOCOL. Leave USERNAME empty to use the device’s saved login name, or type one for this transfer.
- Click Download.
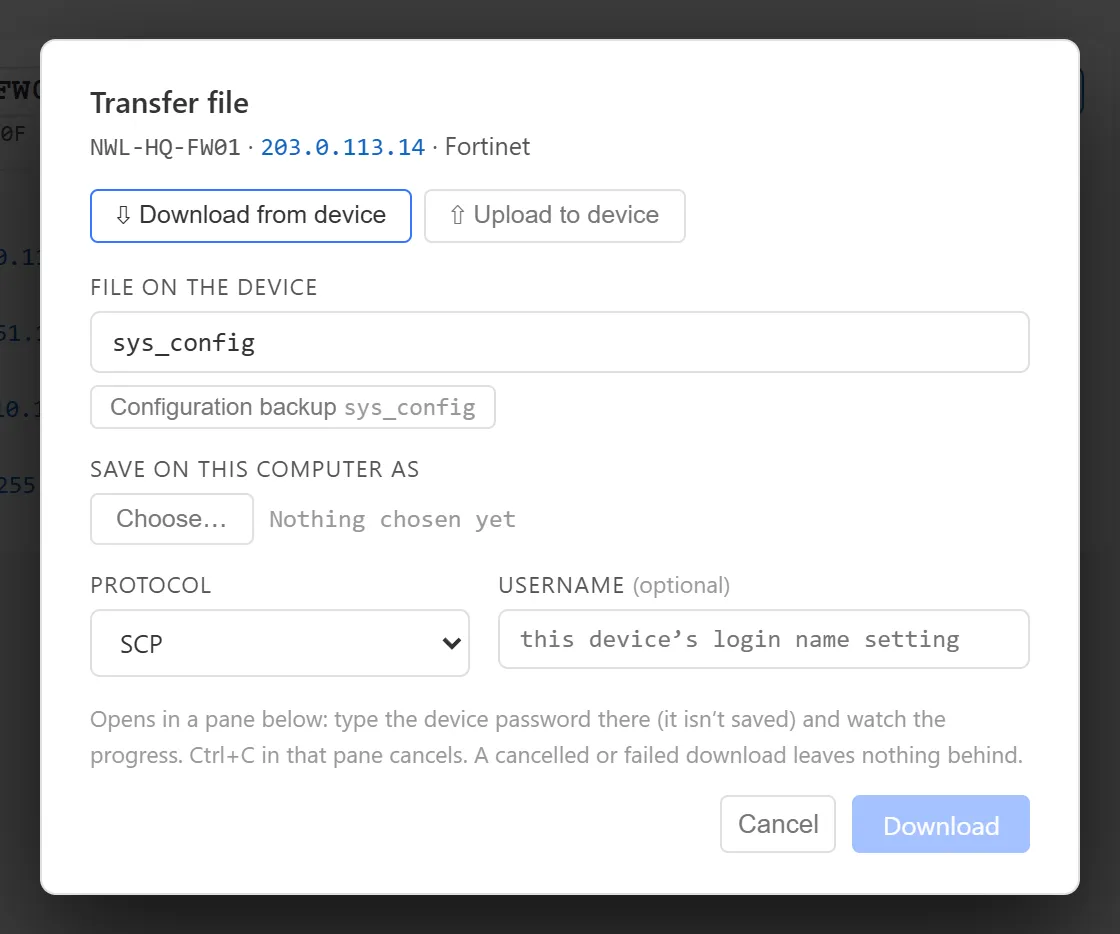
The transfer opens in a terminal pane. If you already have a live SSH session to that host, the pane opens below it; otherwise it gets its own tab. Type the device password in the pane (it isn’t saved) and watch pscp’s progress line. Host keys come from the same trusted list your SSH tabs and PuTTY use.
When it finishes, the pane bar shows the saved file name and a Show in folder button. If it fails, the bar shows the error and Try again…, which reopens the dialog with your choices filled in.
Upload a file to a device
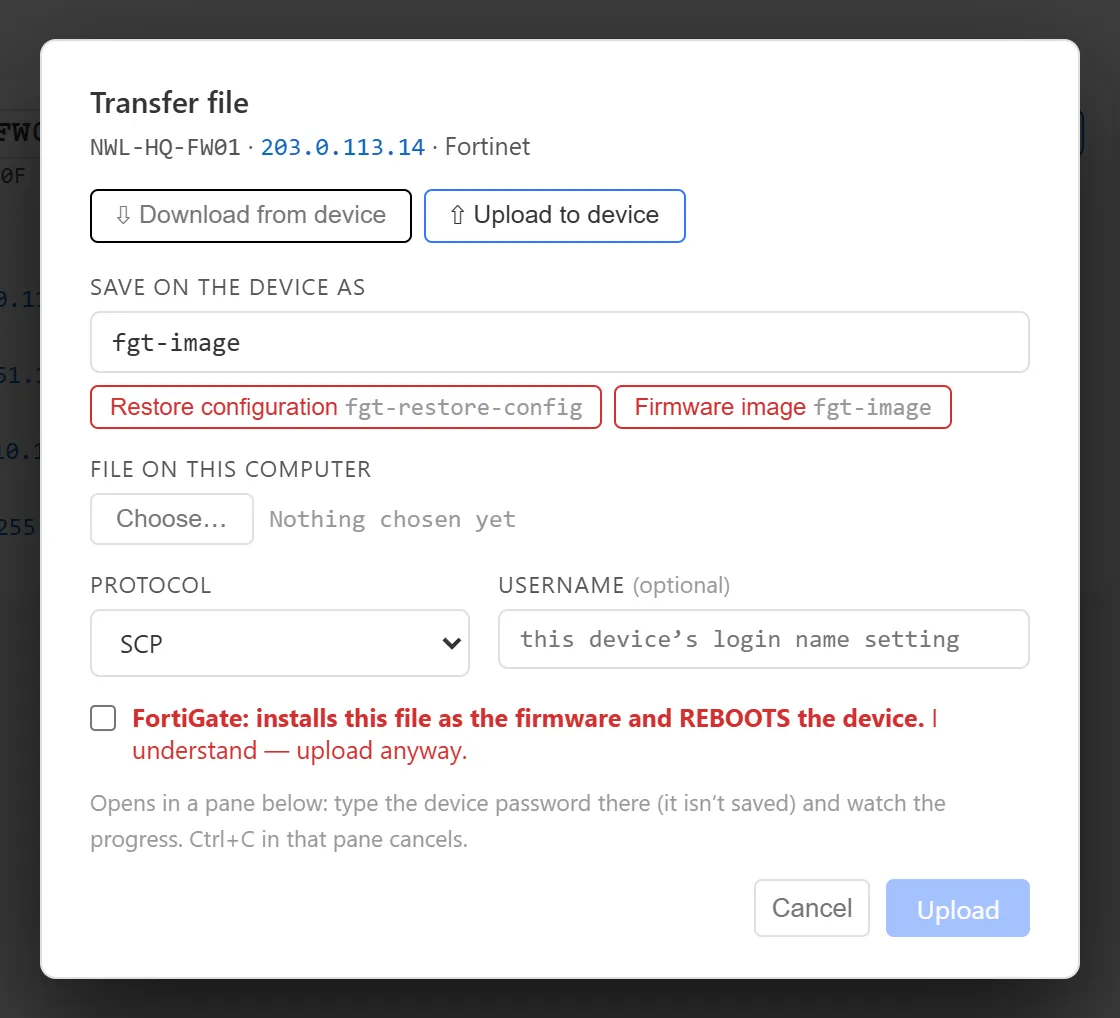
Section titled “Upload a file to a device”- Right-click the device in the sidebar and click Quick transfer (SCP)….
- Click ⇧ Upload to device.
- Under SAVE ON THE DEVICE AS, type the remote path or click a hint:
- FortiGate: Restore configuration (
fgt-restore-config) or Firmware image (fgt-image). - Cisco: To flash: (add the file name after
flash:).
- FortiGate: Restore configuration (
- Under FILE ON THIS COMPUTER, click Choose… and pick the file.
- Click Upload, then type the password in the pane that opens.
From an SSH session
Section titled “From an SSH session”If you’re already in an SSH tab to the device, right-click the tab or the pane header and click Quick transfer (SCP)…. The same item is in ☰, Session. The transfer pane opens below the session.
Cancel a transfer
Section titled “Cancel a transfer”Press Ctrl+C in the transfer pane, or right-click the pane and click Cancel transfer.
Things to know
Section titled “Things to know”- The remote path can’t contain spaces or quotes and can’t start with
-. The field turns red if it can’t be used. - The local file is always picked in the Windows dialog. Downloads default to your Downloads folder.
- The username and
.ppkkey file come from the device’s connection options on this computer. ArkhiNet never stores passwords or keys. - Downloaded files are ordinary files on disk. They are not covered by data-file encryption.
- You can hide Quick transfer in Settings, Features if you never use it.