
Interface tour
ArkhiNet runs in one window. The sidebar on the left is your inventory; everything on the right lives in tabs, starting with Home. This page names each part so the rest of the docs make sense.
Sidebar tree
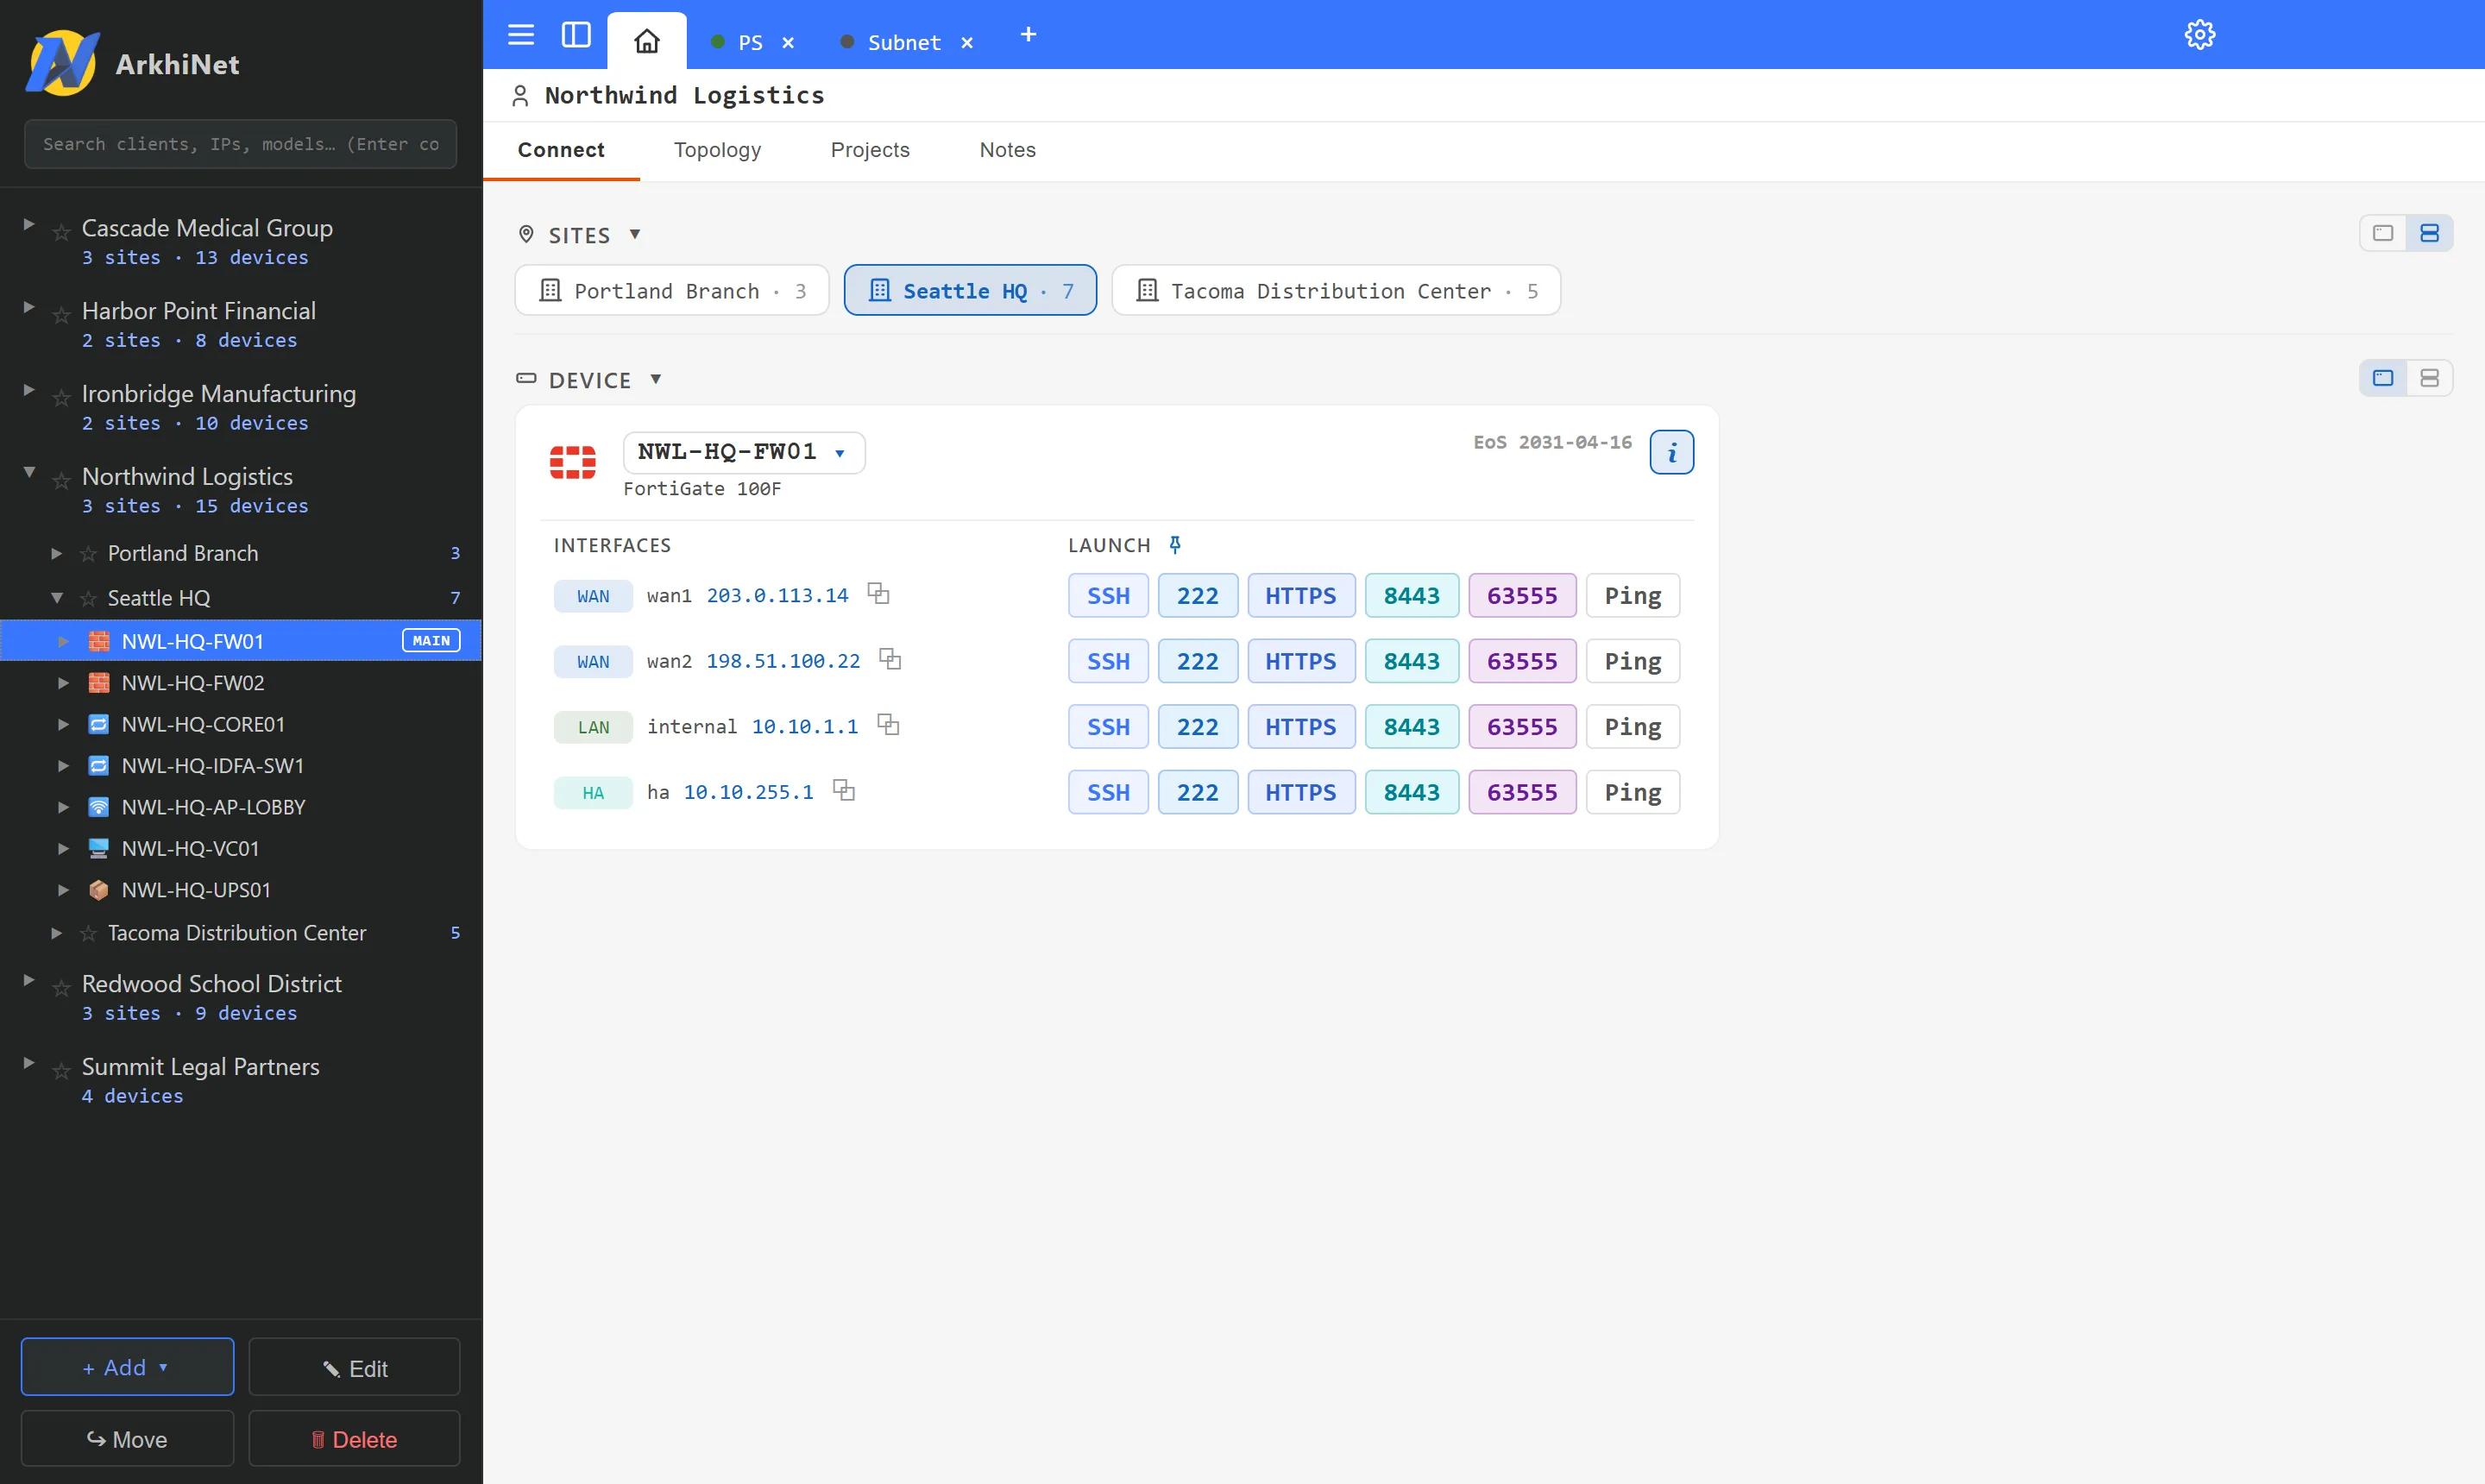
Section titled “Sidebar tree”The sidebar shows your inventory as a tree: client, site, device, and each device’s interfaces with their role tags.
- Search at the top filters the tree as you type: client names, IPs, models, tags and more. Press Enter to select the top match. See Search the inventory.
- Click a device to show it on the Home tab. Double-click a device (or press Enter) to connect to its active interface with its first SSH Launch Button; double-click an interface to connect to that address.
- Right-click any item for its menu. A device’s menu has CONNECT VIA (pick an interface, then a Launch Button or Ping) plus Edit, Set as main, Move… and Delete.
- ★ pins a client or site to the top of the list.
- A small dot next to a device or interface means a session to it is open.
- The buttons at the bottom act on the selected item: + Add ▾ (client, site or device), ✎ Edit, ↪ Move and 🗑 Delete.
Hide the sidebar with Ctrl+B (Ctrl+Shift+B inside a terminal). While it’s hidden, a client switcher with the same Add, Edit, Move and Delete actions appears under the tab strip.
Home tab and the client header
Section titled “Home tab and the client header”The Home tab (the house icon, always first) is the workspace for the client selected in the sidebar. The client’s name runs across the top; right-click it for client actions such as editing the client or adding a site.
Below it are four tabs:
- Connect: a strip of the client’s sites and a card for the selected device, with each interface’s Launch Buttons and Ping. This is where most connections start.
- Topology: the network diagram for the selected site.
- Projects: task tracking for the client.
- Notes: free-form notes for the client, saved as you type.
Topology, Projects and Notes can be hidden in Settings → Features. Ctrl+scroll zooms the Home tab.
The tab strip
Section titled “The tab strip”The strip across the top of the window is also its title bar. From left to right:
- ☰ opens the menu (see below).
- The sidebar toggle shows or hides the sidebar.
- Home, then your open tabs. Terminals, tools, Notepad files and File Transfer each open as a tab, and a tab can be split into up to four panes.
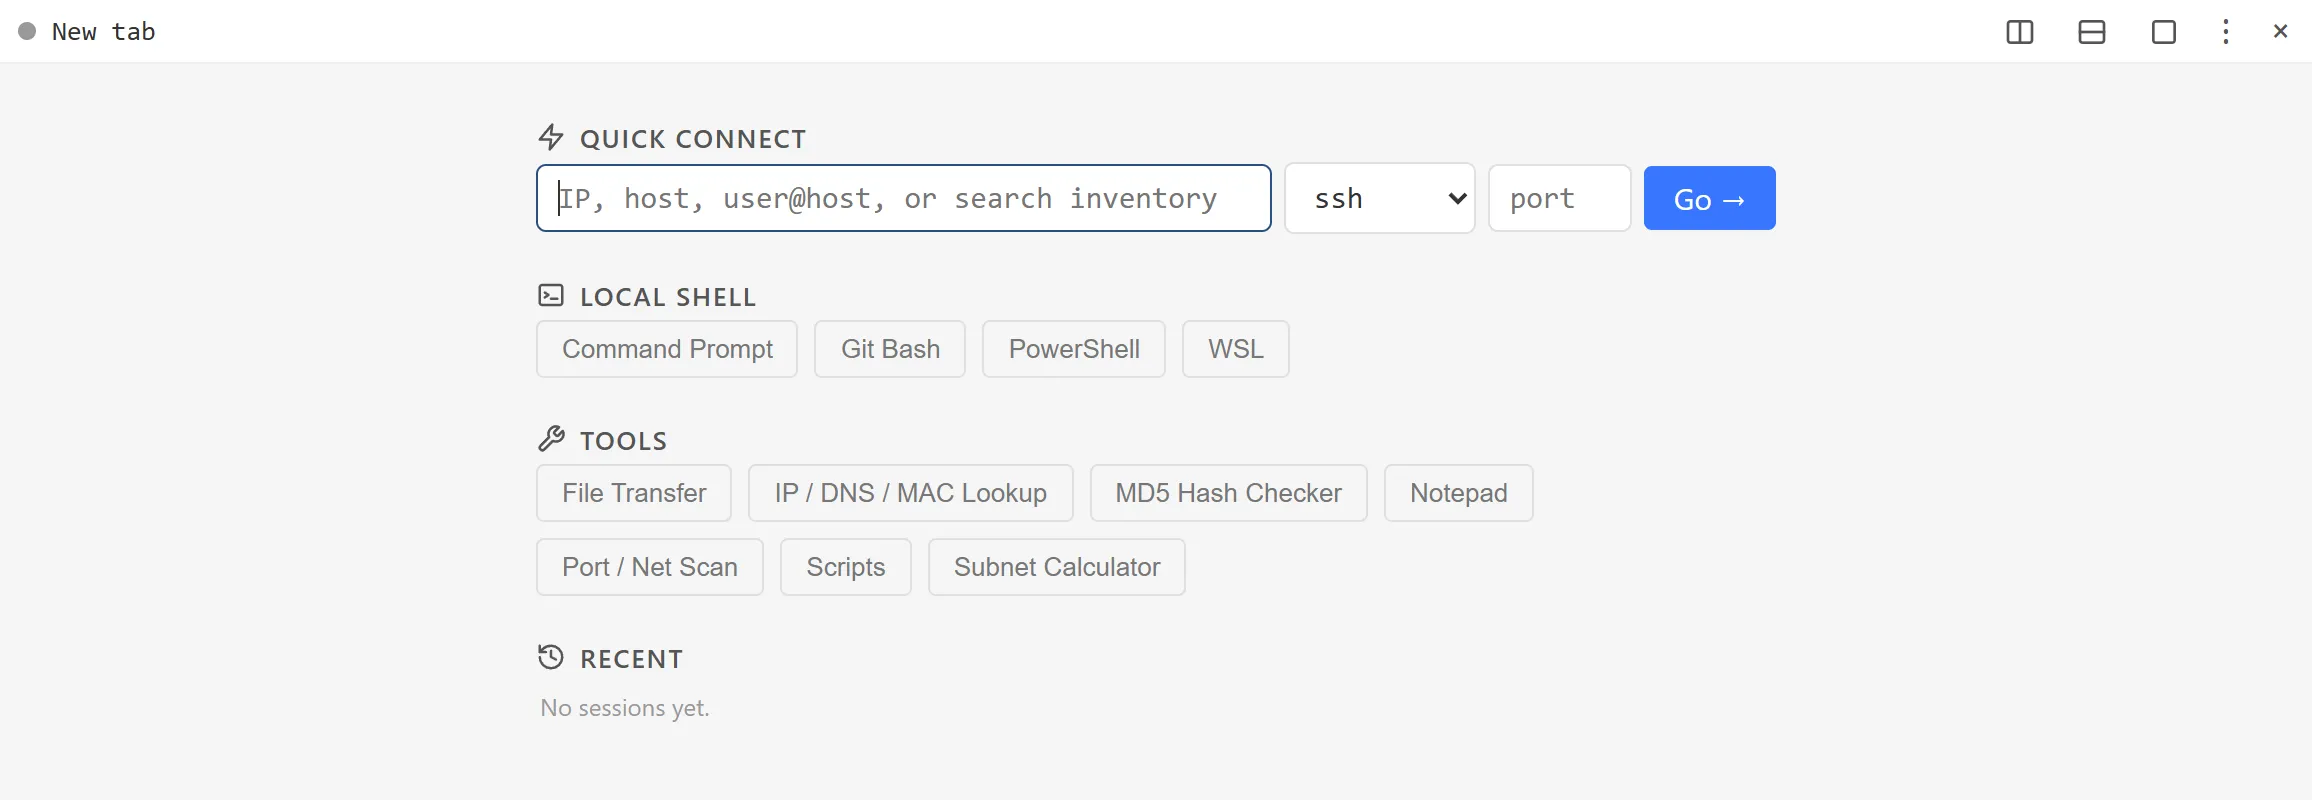
- + opens the new-tab screen (Ctrl+T, or Ctrl+Shift+T inside a terminal), with QUICK CONNECT, LOCAL SHELL, TOOLS, SAVED TABS and RECENT.
- ⚙ opens Settings.
- 🔒 locks ArkhiNet. It appears only when your data file is encrypted. See Lock ArkhiNet.
Right-click a tab for its menu (split, duplicate, save the tab, logging and more). Middle-click a tab to close it.
The ☰ menu
Section titled “The ☰ menu”The menu follows whatever you’re working in:
- On Home or a tool: File (open, create or save the data file, Import Connections…, Export Inventory Report…, Settings…, Exit), View and Help.
- In a terminal: Session (the same items as the tab’s right-click menu), Edit, View and Help.
- In a Notepad tab: File, Edit, Search, View and Help.
View → Theme switches the app theme.
Settings
Section titled “Settings”Open Settings with ⚙, Ctrl+,, or ☰ → File → Settings…. The sections are General, Features, Data file, Security, Connections, Terminal, Diagrams & Reports, License and Updates & About. The search box at the top finds a setting by name.
Help and keyboard shortcuts
Section titled “Help and keyboard shortcuts”☰ → Help has:
- Keyboard Shortcuts: every shortcut in one dialog. The same list is in Keyboard shortcuts.
- What’s New in v…: the release notes for your version.
- Check for Updates…
- Open Log Folder: the local error log, useful when reporting a problem.
- About ArkhiNet
Ctrl+G opens Global Search from anywhere: search the whole inventory, click a result to go to it, or press Enter to connect to the top hit.