
Export a PDF inventory report
The inventory report turns your clients, sites and devices into a branded PDF you can hand to a client or keep as a dated record. It’s a snapshot of what’s in your inventory at the moment you export: models, firmware, IP addresses and end-of-support dates, with no agents or polling involved.
What’s in the report
Section titled “What’s in the report”- A dark cover page with your logo, the title Network Inventory Report, the date, Prepared by with your engineer name, and totals for the clients, sites and devices included.
- A section per client with its device and site counts and its tags.
- A table per site with Device, Type, Model, Firmware, End of Support and IP Addresses for every device. The site’s main device is marked with ★, and each IP is shown with its interface name, for example
wan1: 203.0.113.14. - Site notes under each table, if you choose to include them.
- A footer on every page after the cover with your engineer name and the date.
If you’ve renamed your levels in Settings → General → What you call things, the report uses your words, such as Company and Location instead of Client and Site.
Set your engineer name and logo
Section titled “Set your engineer name and logo”Do this once; the report remembers both.
- Open Settings (Ctrl+,).
- Under General, find Engineer name, type your name and click Save. This is the name shown as Prepared by on the cover and in the footer. If it’s blank, the cover leaves out the Prepared by line.
- Go to Diagrams & Reports. Under Report logo, click Browse… and pick a PNG, JPG or SVG file. A preview appears. Click Change Logo… to replace it or ✕ Clear to remove it.
You can also set or change the logo from the export dialog itself.
Export the report
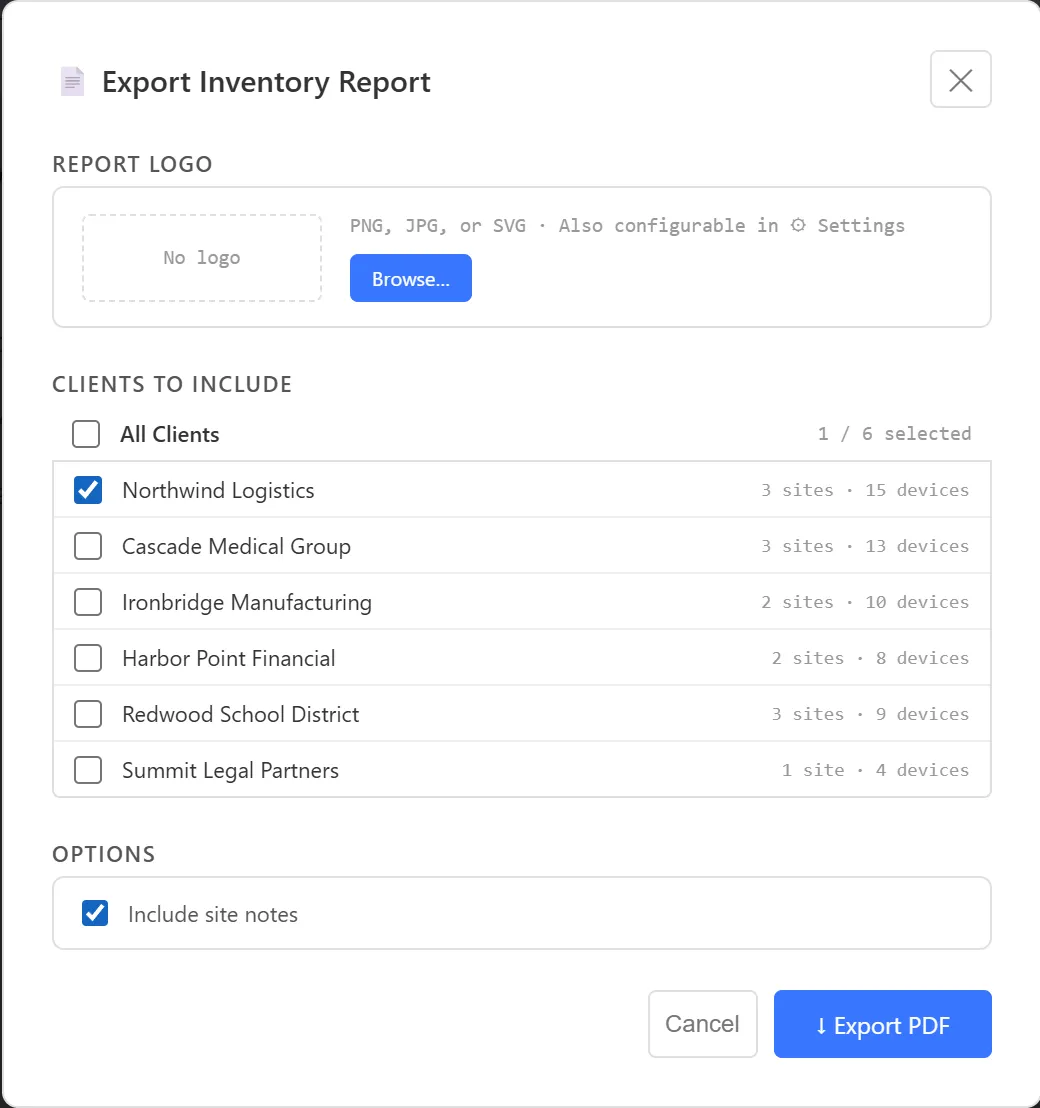
Section titled “Export the report”- Click ☰ at the top left of the window, then File → Export Inventory Report…. The 📄 Export Inventory Report dialog opens.
- Under REPORT LOGO, check the logo. Click Browse… or Change… to pick a different one, or ✕ Clear to export without a logo. A logo you pick here is saved for next time.
- Under CLIENTS TO INCLUDE, tick the clients you want. All Clients ticks or clears them all, and the counter shows how many are selected. Each row shows the client’s site and device counts.
- Under OPTIONS, tick or clear Include site notes.
- Click ↓ Export PDF.
- Choose where to save the file. The name defaults to
ArkhiNet-Report-followed by today’s date.
When the dialog opens, ArkhiNet pre-selects the client you have open. If no client is open, every client is selected.
End-of-support colors
Section titled “End-of-support colors”The End of Support column is color-coded so aging hardware stands out:
| Color | Meaning |
|---|---|
| Red | The end-of-support date has passed. |
| Amber | End of support is less than 12 months away. |
| Gray | More than 12 months away, or no date known. |
The dates come from Fortinet’s published hardware end-of-support list, which ArkhiNet downloads when it starts. They are matched on the device’s model, so Fortinet hardware with its model filled in, such as a FortiGate 100F, gets a date. Devices from other vendors, and devices with no model, show a dash. See Fortinet End-of-Support dates for how the matching works.
Hide the report
Section titled “Hide the report”If you don’t use the report, turn off Inventory report in Settings → Features. This removes the menu item only; nothing is deleted.