
Draw a site diagram
Every site gets a network diagram on its Topology tab, drawn from the devices, interfaces and connections already in your inventory. There is nothing to draw from scratch: add the devices, link them, and ArkhiNet lays out a clean, client-ready diagram that you can fine-tune by hand.
Open a site’s diagram
Section titled “Open a site’s diagram”- Click a client in the sidebar, for example Ironbridge Manufacturing.
- Click the Topology tab.
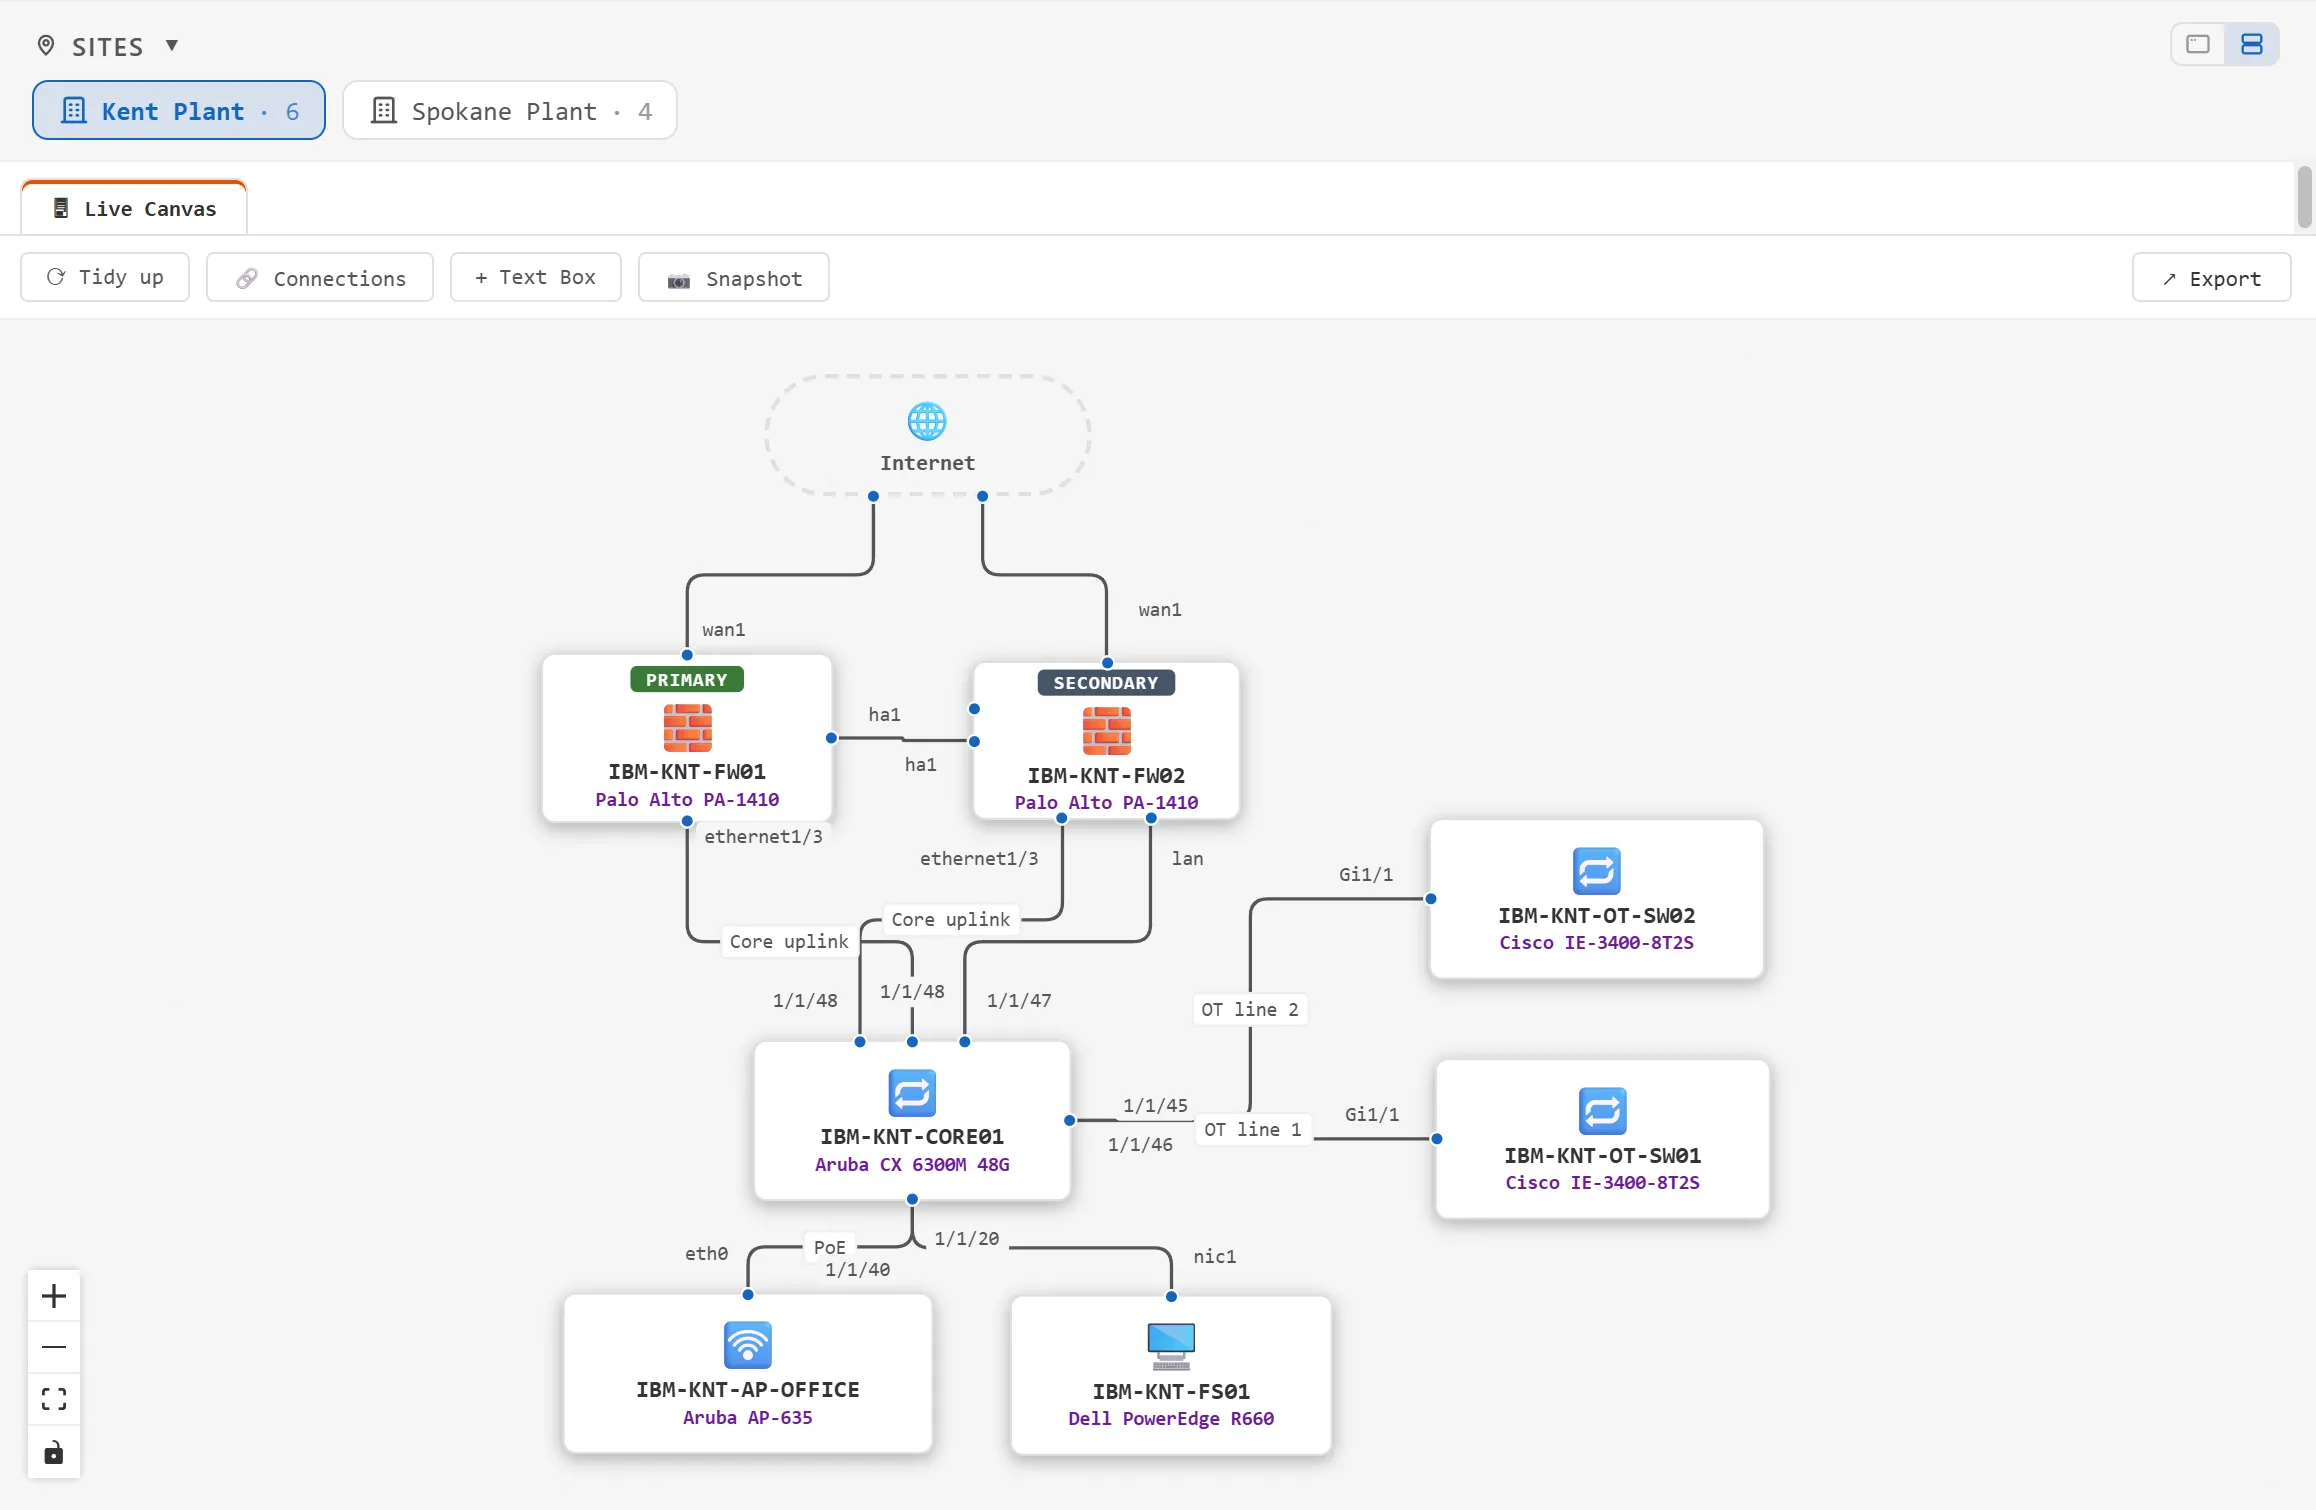
- Click a site chip in the strip above the canvas, for example Kent Plant, to show that site’s diagram. Click another chip to switch sites without leaving the tab.
The diagram you work on is the Live Canvas, the first tab above the toolbar. Any snapshots you’ve taken sit next to it (see Snapshots and export).
Use the zoom controls in the corner of the canvas, or your mouse wheel, to zoom, and drag empty canvas to pan.
How the automatic layout works
Section titled “How the automatic layout works”ArkhiNet arranges the diagram in tiers, starting from the Internet side:
- Internet at the top, then firewalls and routers, core switches, access switches, and access points and servers at the bottom. Each row is lined up and evenly spaced.
- HA pairs sit side by side. Tick High Availability (HA) pair on a device and the diagram shows a primary and a secondary unit next to each other, labeled PRIMARY and SECONDARY, with the HA link between them. A core switch pair shares a row with the firewall centered over it.
- DMZ servers sit next to their firewall, at the right end of its row.
- Right-angle lines with small rounded corners, routed so they don’t run through a box. Lines leave from the side that faces the other device.
- Interface labels sit just outside each device, beside their own line, placed so they don’t land on a box or on another label.
The device type you choose in the device editor (Firewall, Router, Switch, Access Point, Server, Other) decides which tier a device goes in. Interface roles add the clouds: a WAN interface adds an Internet cloud, a DMZ interface adds a DMZ cloud, and a LAN interface adds an Internal Networks cloud when the site has no switch to stand in for the internal network.
Links between devices come from the Connections manager. See Connect devices on the diagram.
Adjust the layout by hand
Section titled “Adjust the layout by hand”Drag any device to move it. Moves snap to a 10 px grid and are remembered, and a faceplate’s name tag moves with its device.
To move an interface label, drag it. Double-click a moved label to put it back in its automatic spot.
Your changes stick when the inventory changes. A new device appears next to whatever it’s connected to without moving anything you arranged, deleted devices drop out, and renames show up right away.
Right-click a device on the Live Canvas to get its connect menu, the same Launch Buttons and Ping you have elsewhere. See Launch Buttons.
Tidy up
Section titled “Tidy up”⟳ Tidy up puts everything back in its automatic place: devices go back to their automatic positions and labels you moved go back to their automatic spots. Text boxes, and connection points you placed in the Connections manager, are kept.
- Click ⟳ Tidy up in the toolbar.
- If you haven’t moved anything by hand, the diagram is tidied straight away.
- If you have, ArkhiNet asks Tidy up this diagram? first. Choose one:
- Snapshot, then tidy up saves the current arrangement as a snapshot tab, then tidies.
- Tidy up tidies without keeping the old arrangement.
- Cancel leaves everything as it is.
Add a text box
Section titled “Add a text box”Text boxes are free-form notes on the canvas, such as a circuit ID, a VLAN list or “Fiber to Building B”.
- Click + Text Box in the toolbar. A new box appears on the canvas.
- Double-click the box to edit it. It shows Double-click to edit until it has text.
- Type your note. Press Shift+Enter for a new line, and Enter or click away to finish.
- Drag the box to place it. Select it to show resize handles at its corners.
To remove a text box, click it to select it and press Delete or Backspace. Text boxes are the only items you can delete on the canvas; devices and connections come from your inventory and the Connections manager.
Use vendor icons
Section titled “Use vendor icons”By default each device is drawn as a box with its type icon, name and model. If you have vendor stencils as SVG files, ArkhiNet can draw devices as their real faceplates instead.
- Put your
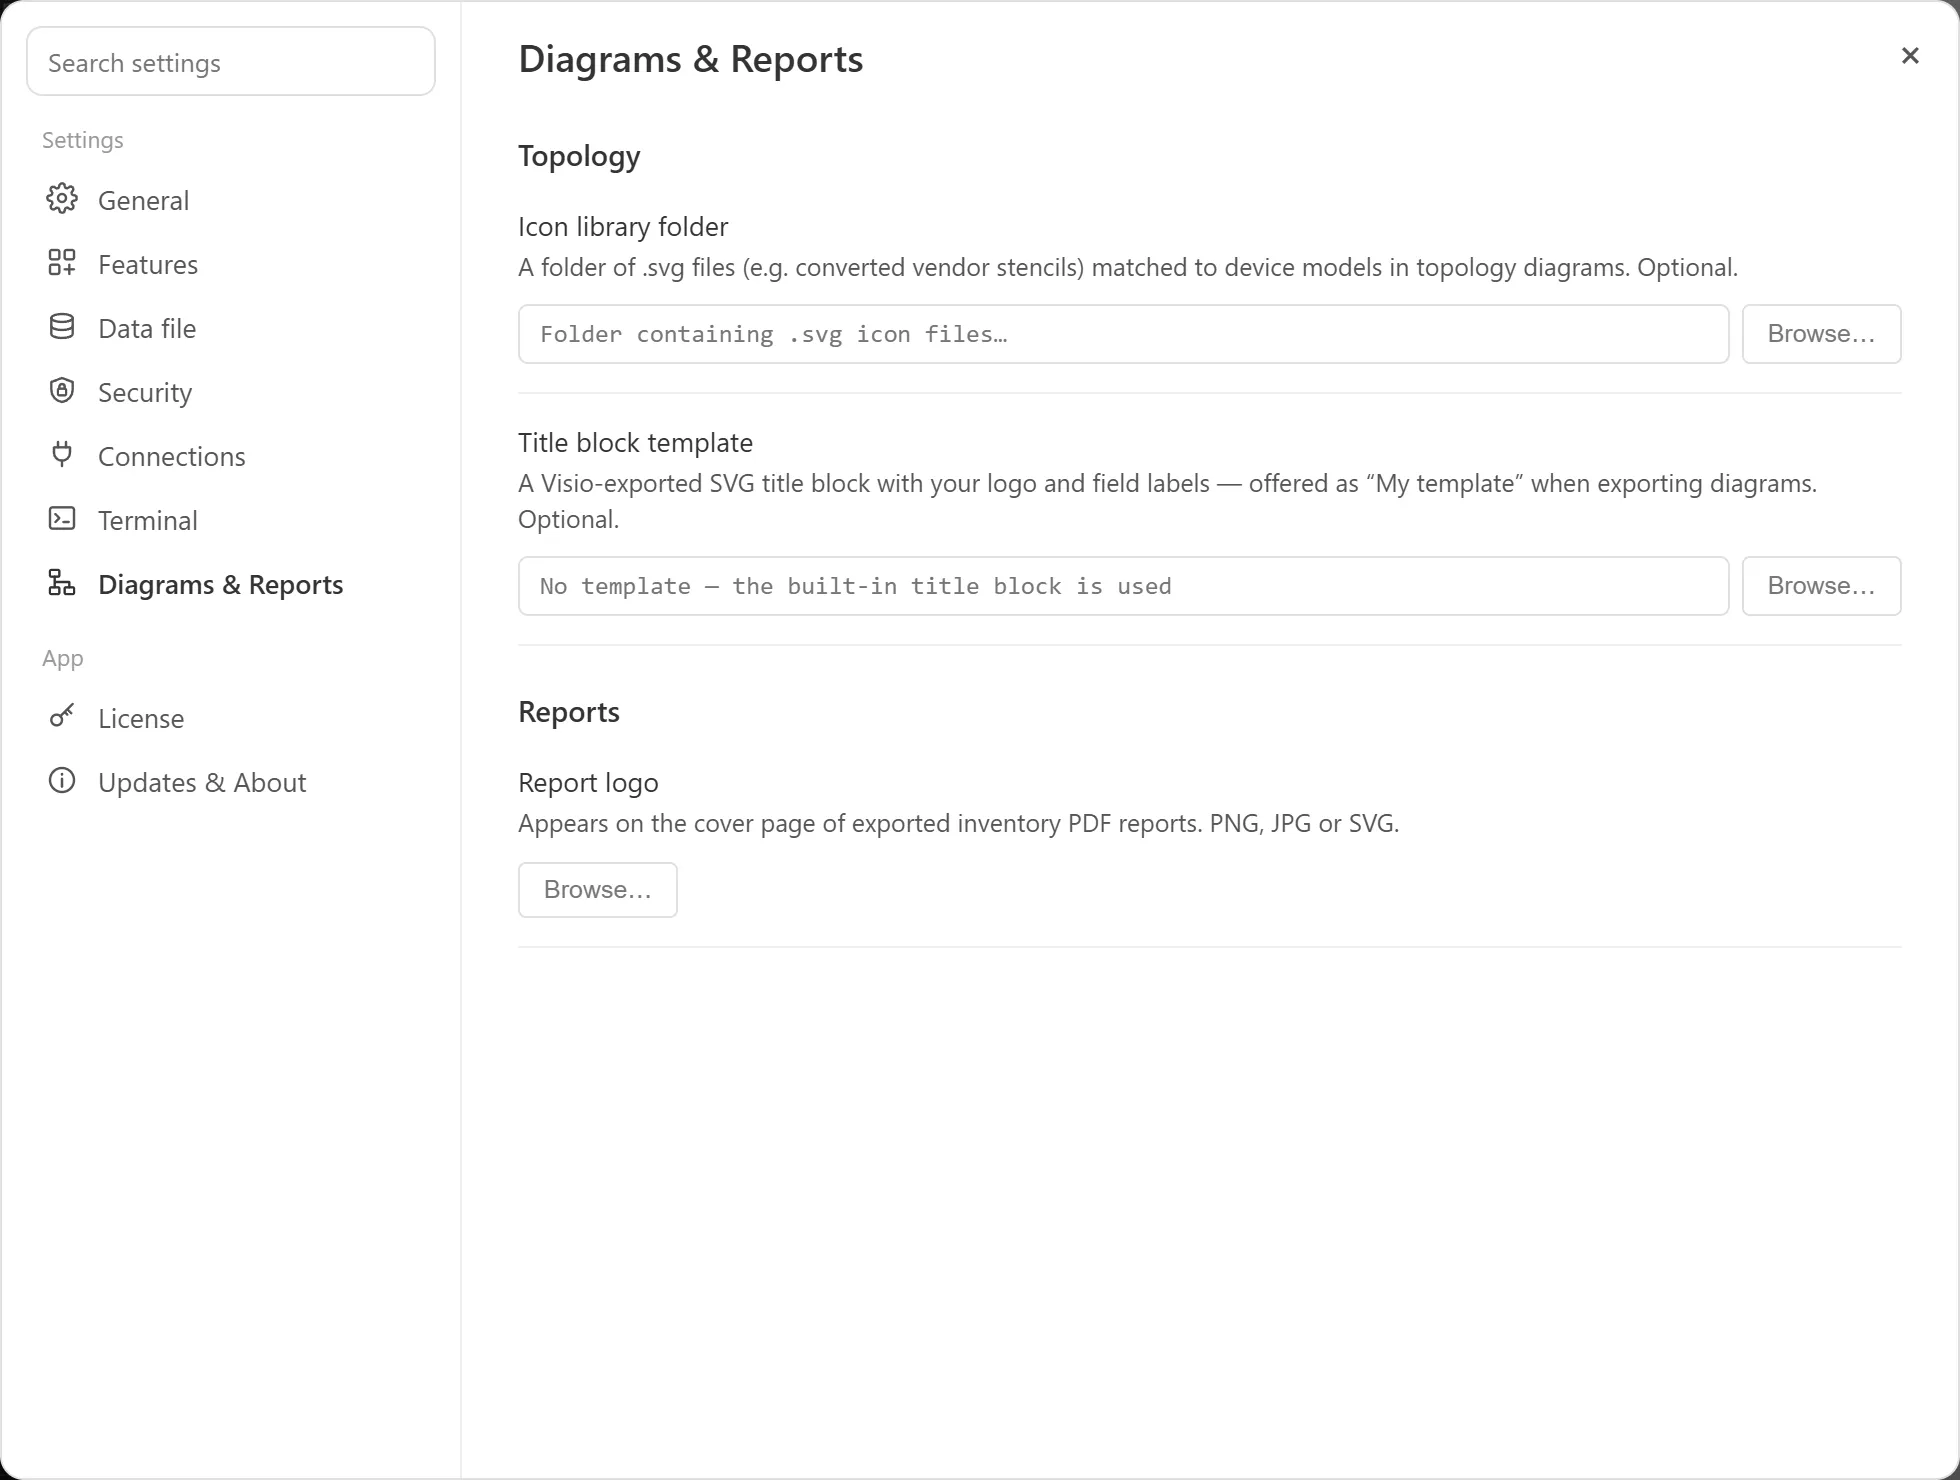
.svgfiles in one folder. ArkhiNet reads the files directly in that folder, not in subfolders. - Open Settings (Ctrl+,) and go to Diagrams & Reports.
- Under Icon library folder, click Browse… and pick the folder.
- Go back to the Topology tab. Devices whose model matches an icon file are drawn with that icon.
Matching compares the file name with the device’s model, ignoring case, spaces, hyphens, underscores, dots and brackets. A file named FortiGate-100F.svg matches a device whose model is FortiGate 100F. Devices with no matching file keep the standard box.
Hide the Topology tab
Section titled “Hide the Topology tab”If you don’t use diagrams, turn off Topology in Settings → Features. This hides the tab only. Nothing is deleted, and you can turn it back on at any time.