
Snapshots and diagram export
Snapshots keep a dated, read-only copy of a site diagram, so you can record how a network looked before a change and still keep editing the live one. Export turns the diagram, live or from a snapshot, into a PNG for a quick share or a PDF for a client deliverable.
Take a snapshot
Section titled “Take a snapshot”- Open the site’s diagram on the Topology tab, with the Live Canvas tab selected.
- Arrange the diagram the way you want to keep it.
- Click 📷 Snapshot in the toolbar.
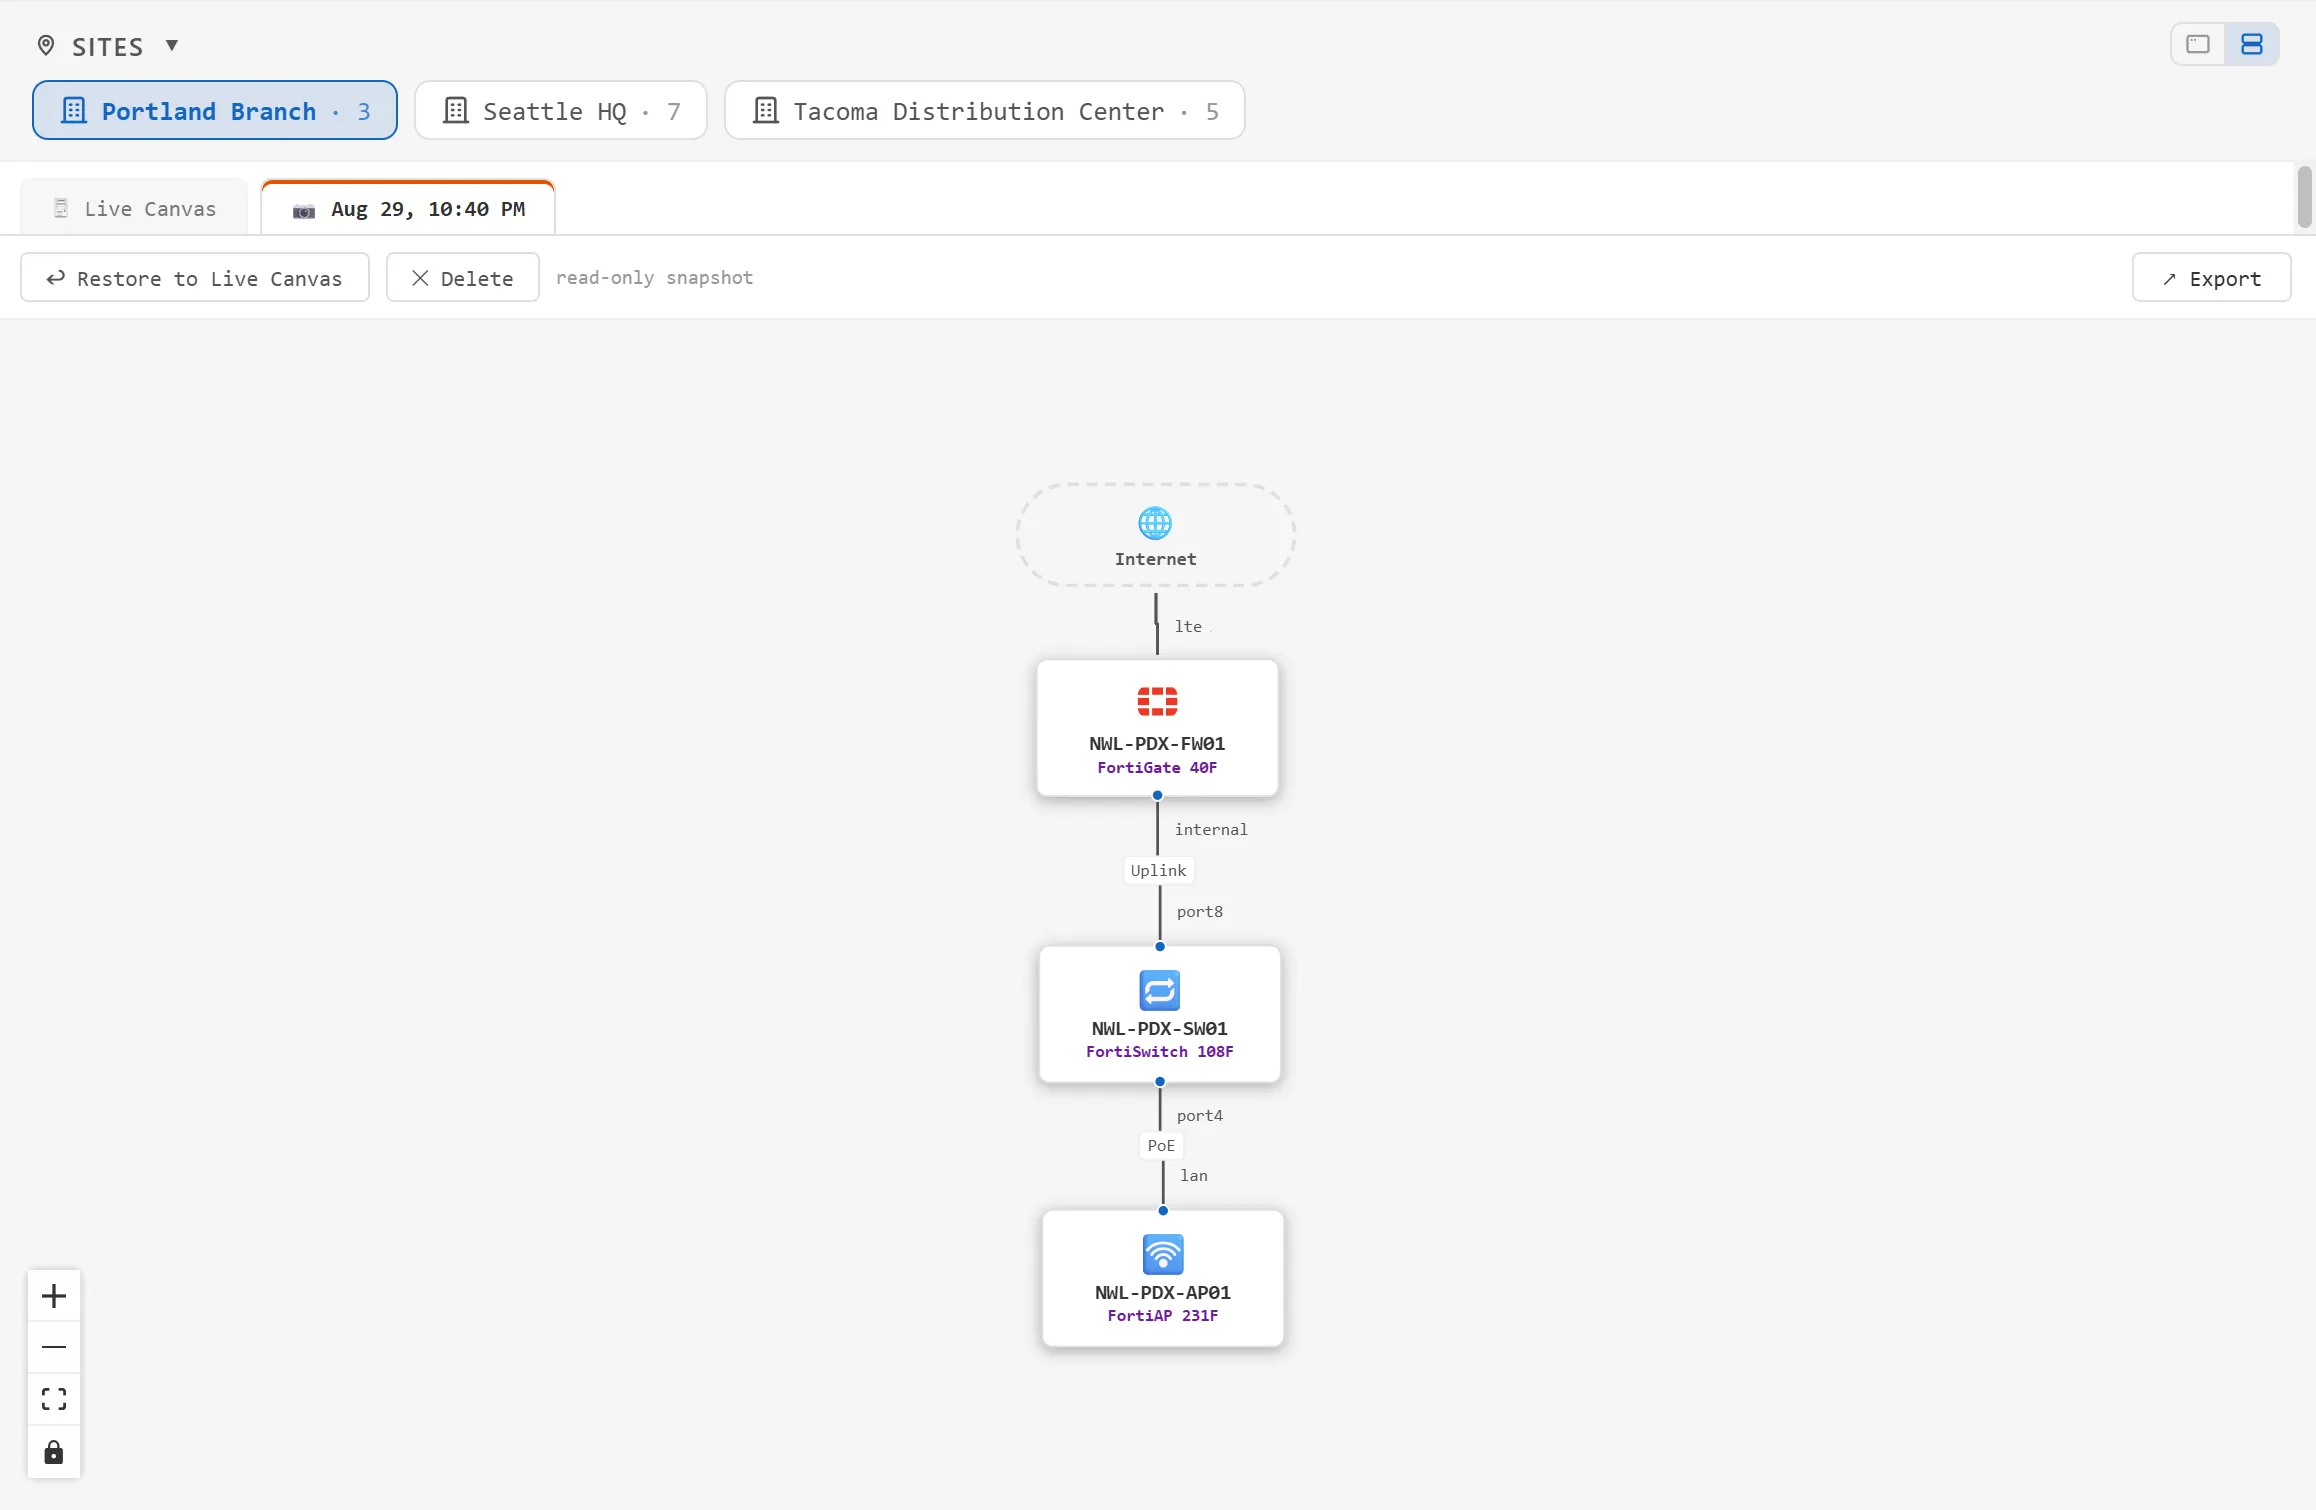
A new tab appears next to Live Canvas, named with the date and time, for example 📷 Aug 29, 10:40 PM. Snapshots are saved with the site in your data file.
You can also take one from the Tidy up this diagram? prompt by choosing Snapshot, then tidy up. See Draw a site diagram.
View, restore or delete a snapshot
Section titled “View, restore or delete a snapshot”Click a snapshot’s tab to view it. A snapshot is read-only: you can pan and zoom, but you can’t move devices, add text boxes or edit connections. The toolbar shows read-only snapshot and two actions:
- ↩ Restore to Live Canvas copies the snapshot’s arrangement onto the Live Canvas and switches to it.
- ✕ Delete removes the snapshot.
Export a diagram
Section titled “Export a diagram”Export works on whichever tab is selected, so you can export a snapshot directly without restoring it first.
- Select the Live Canvas or a snapshot tab.
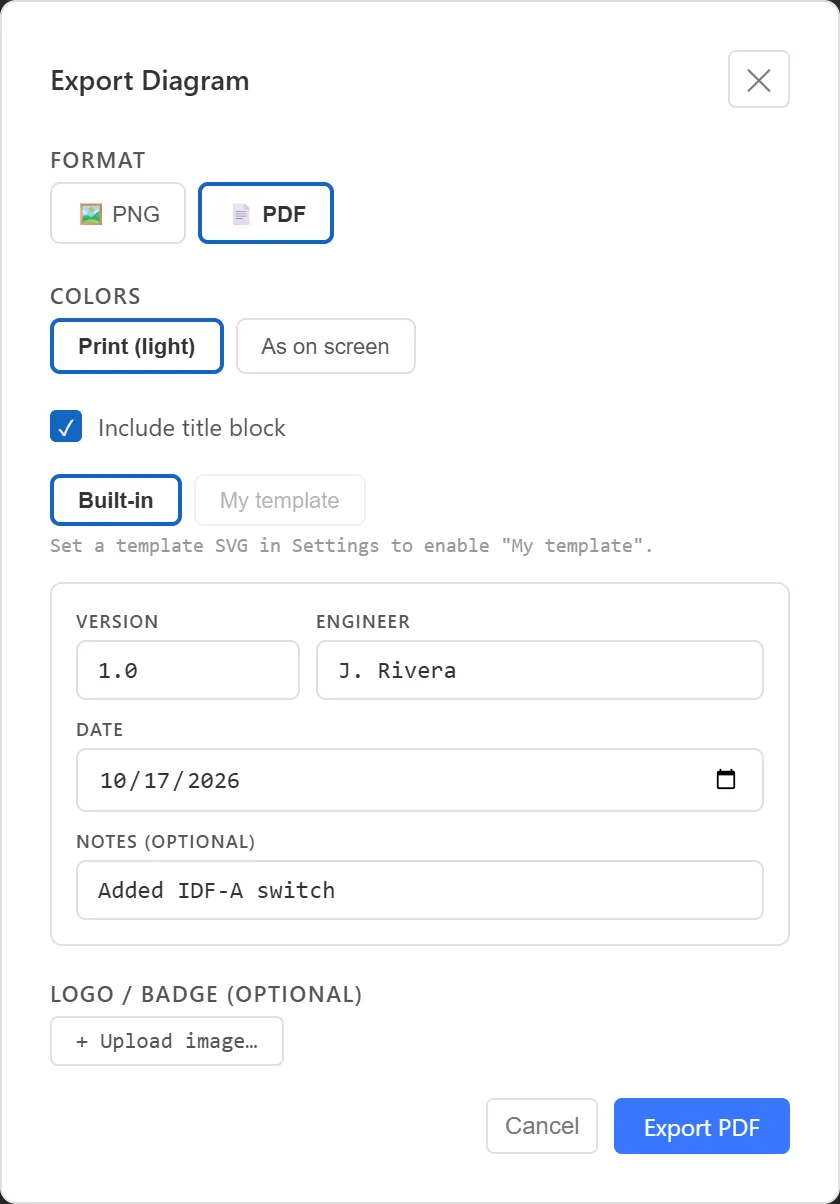
- Click ↗ Export at the right end of the toolbar. The Export Diagram dialog opens.
- Under FORMAT, choose 🖼️ PNG or 📄 PDF.
- Under COLORS, choose:
- Print (light), the default, draws the diagram in light colors on a white page, even if ArkhiNet runs a dark theme. Use it for anything that will be printed or sent to a client.
- As on screen keeps your current theme’s colors.
- Optionally tick Include title block and fill it in (see below).
- Click Export PNG or Export PDF, then choose where to save the file. The file name defaults to the site name.
The export is always the whole diagram at full size, no matter how big your window is or how far you’ve zoomed. Connection dots and resize handles are left out. PDF images are compressed, so even a large site gives a small file.
Add a title block
Section titled “Add a title block”A title block is a strip along the bottom of the export with the client, site and revision details, like the title block on an engineering drawing.
- In Export Diagram, tick Include title block.
- Choose the style:
- Built-in draws ArkhiNet’s own title block.
- My template uses your own SVG title block. It’s available once you’ve set a template in Settings (below).
- Fill in VERSION, ENGINEER and DATE. ENGINEER starts with the engineer name from Settings → General, and DATE with today’s date.
- For the built-in block you can also add NOTES (OPTIONAL), such as a change description, and a logo under LOGO / BADGE (OPTIONAL) with + Upload image….
The client and site names are filled in for you.
Use your own title block template
Section titled “Use your own title block template”If your company has a standard title block, export it from Visio as an SVG and use it as a template.
- Open Settings (Ctrl+,) and go to Diagrams & Reports.
- Under Title block template, click Browse… and pick the SVG file.
- ArkhiNet checks the file. If it reports missing value cells, re-export the SVG from Visio without restructuring the title block.
ArkhiNet fills the template with the client, site, version, engineer and date when you export. The template’s own logo is used, so the LOGO / BADGE option is hidden when My template is selected. To stop using it, click ✕ next to the path.
Other formats
Section titled “Other formats”PNG and PDF are the only export formats. The diagram itself is the editable source, and it stays with the site in ArkhiNet. For a full inventory document across clients, see PDF inventory reports.