
Port / Net Scan
Port / Net Scan combines two scanners in one tab: a port scanner that checks the TCP ports on one host, and a network scanner that finds the live hosts on a subnet. Both try to identify what they find, so you can tell a FortiGate from a Linux box at a glance, connect to it, or add it to your inventory.
Both scanners use plain TCP connections from this computer. Nothing extra needs to be installed. Only scan networks you’re responsible for or have permission to scan.
Open Port / Net Scan
Section titled “Open Port / Net Scan”- Click + in the tab strip, or press Ctrl+T, to open the new-tab screen.
- Under TOOLS, click Port / Net Scan.
The tool opens in its own tab, labeled Scan. The port scanner is at the top and the network scanner below it. You can also pick it from the TOOLS section of any empty pane after you split a tab.
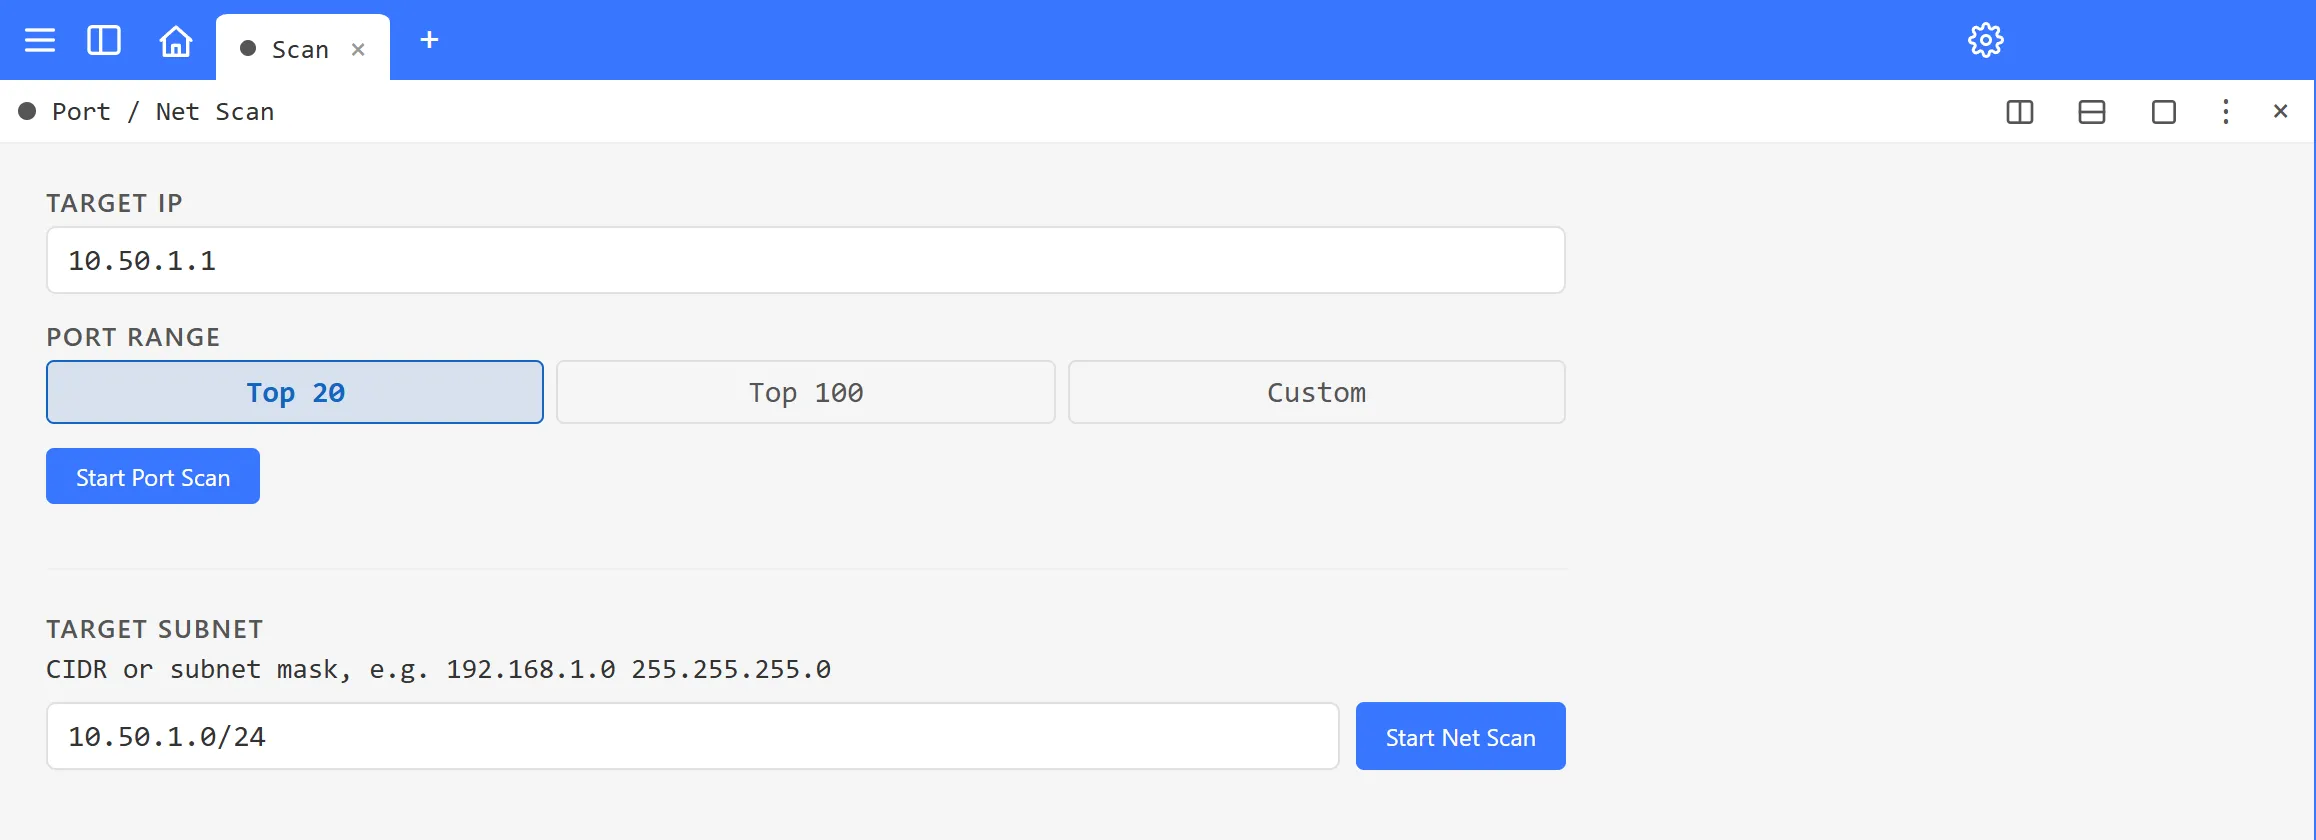
Scan a host’s ports
Section titled “Scan a host’s ports”- In TARGET IP, type the host’s address, for example
192.168.1.1. - Under PORT RANGE, choose:
- Top 20 for the most common service ports, such as SSH, Telnet, HTTP, HTTPS, SMB and RDP.
- Top 100 for a wider set that also covers ports like SNMP, LDAP, VNC, WinRM and common database and alternate web ports.
- Custom to enter your own list, with commas and ranges, for example
22,80,443,8000-8100.
- Click Start Port Scan, or press Enter in the address box.
The button shows the progress as a percentage, with a bar and a count of open ports found so far.
When the scan finishes you get:
- A device guess at the top, with the vendor and model, a type such as firewall, switch or AP, and HIGH, MEDIUM or LOW CONFIDENCE.
- Each open port, with its usual service name and, for the common web and SSH ports, the banner the service returned, such as a web server header, a page title or an SSH version string.
ArkhiNet’s identification looks at the open ports and those banners. It recognizes, among others, FortiGate, FortiSwitch and FortiAP, Palo Alto, Cisco, Meraki MX, SonicWall, Sophos, Ubiquiti and Juniper devices, plus Linux servers. Treat it as a hint: the confidence level tells you how sure it is.
Connect from a scan result
Section titled “Connect from a scan result”Ports that ArkhiNet knows how to open are underlined and have a button next to them. Click the port number or the button:
| Ports | Button | What happens |
|---|---|---|
| 22, 222 | SSH | Opens an SSH session to the host. |
| 23 | Telnet | Opens a Telnet session. |
| 80, 443, 4443, 8080, 8443, 8888, 63555 | Open | Opens the web interface in your browser. |
| 3389 | RDP | Starts Remote Desktop. |
SSH and Telnet open in an ArkhiNet tab, the same as any other session, unless you’ve set SSH to open in external PuTTY in Settings. You log in as usual; ArkhiNet never stores passwords or keys.
Find live hosts on a subnet
Section titled “Find live hosts on a subnet”- In TARGET SUBNET, type the subnet in CIDR form,
192.168.1.0/24, or as an address and mask,192.168.1.0 255.255.255.0. - Click Start Net Scan, or press Enter.
A progress bar shows how many addresses have been checked and how many are responding. When it’s done, each host is listed with its IP, a device guess with its confidence level, and its open ports. As in the port scanner, ports you can connect to are underlined: click one to connect.
The network scanner works through up to 1,024 addresses at a time, so use a /22 or smaller. For a larger network, scan it in pieces.
You can also start a network scan from IP / DNS / MAC Lookup: click Net Scan next to one of this computer’s interfaces and ArkhiNet scans that interface’s subnet straight away. See IP / DNS / MAC Lookup.
Add a discovered device to your inventory
Section titled “Add a discovered device to your inventory”When the network scanner identifies a host as a firewall, switch, access point or router, it shows a + Add Device button.
- Click + Add Device on the host.
- ArkhiNet opens the add-device form with the IP address, the device type and, where it could tell, the model already filled in. The client and site you have open are pre-selected.
- Check the details, give the device a name, and save it.
Related pages
Section titled “Related pages”- Subnet Calculator to work out the range before you scan it.
- Launch Buttons to set up one-click connections for devices you’ve added.