
Your first client, site and device
This walkthrough builds a small inventory from scratch and ends with a live SSH session. It uses a fictional MSP customer, Northwind Logistics, with its Seattle HQ site and a FortiGate called NWL-HQ-FW01. Swap in your own names as you go.
Add a client
Section titled “Add a client”- At the bottom of the sidebar, click + Add ▾, then Add Client.
- In CLIENT NAME, type
Northwind Logistics. - Optionally set STATUS, add TAGS such as
FortinetandManaged Services Client, and fill in NOTES / PROJECT INFO with contacts or contract details. - Click Save Client.
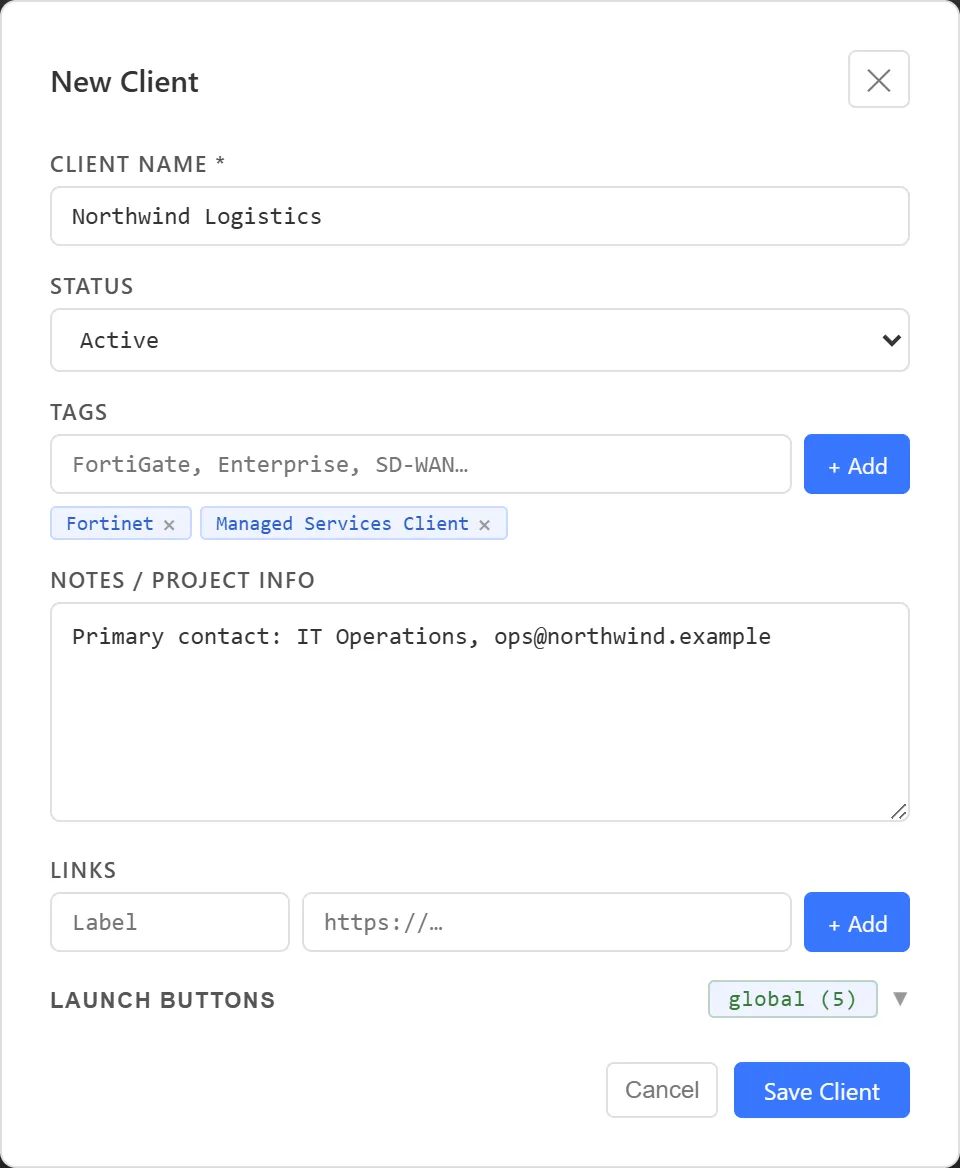
ArkhiNet creates the client with one site already in it, named Main, and selects it. While a client has only one site, the sidebar hides the site level and lists devices directly under the client. Add a second site and the level comes back.
Name the site
Section titled “Name the site”Rename the automatic Main site to the real location.
- In the sidebar, right-click Northwind Logistics.
- Choose Edit site “Main”….
- In SITE NAME, type
Seattle HQ. Use SITE NOTES for the address, circuit details or on-site contacts. - Click Save Site.
To add another location later, click + Add ▾, then Add Site, pick Northwind Logistics in the CLIENT list, enter a name such as Tacoma Distribution Center, and click Add Site.
Add a device with two interfaces
Section titled “Add a device with two interfaces”- With Northwind Logistics selected, click + Add ▾, then Add Device. The CLIENT and SITE lists at the top start on your current selection.
- Fill in the device details:
- DEVICE NAME:
NWL-HQ-FW01 - DEVICE MODEL:
FortiGate 100F - DEVICE TYPE: Firewall
- FIRMWARE VERSION and SERIAL NUMBER are optional.
- DEVICE NAME:
- Under INTERFACE/IP, fill in the first row. Each row has a NAME (the label), an IP / HOSTNAME, and a ROLE:
- NAME
wan1, IP203.0.113.14, ROLE WAN
- NAME
- Click + Add IP and fill in the second row:
- NAME
internal, IP10.10.1.1, ROLE LAN
- NAME
- Leave LAUNCH BUTTONS as it is. The device inherits the buttons set for its site, client or the whole app (see How inheritance works).
- Click Add Device.
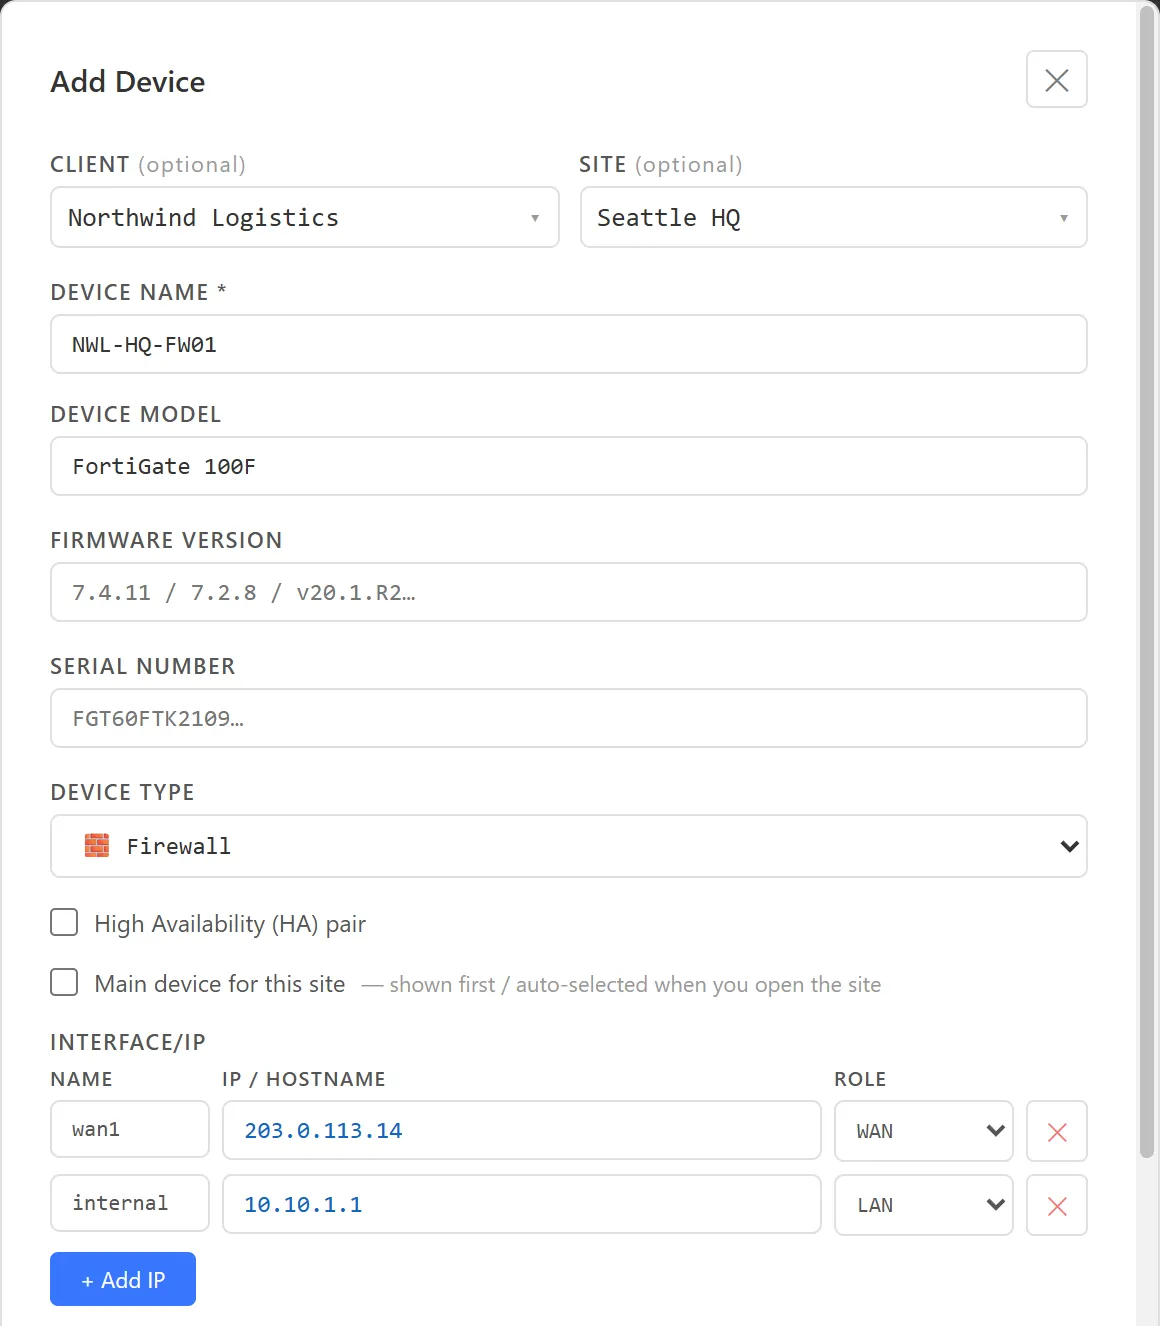
The roles are WAN, LAN, DMZ, MGMT, HA, Loopback and Other. They show as colored tags next to each interface, in the sidebar tree and on the Connect tab. An address can be an IPv4 address or a hostname.
Connect with a Launch Button
Section titled “Connect with a Launch Button”- In the sidebar, click NWL-HQ-FW01. The Home tab opens on Connect for that device.
- The device card lists each interface under INTERFACES, with its role tag, label, address and a copy button. Next to each row, under LAUNCH, are that interface’s Launch Buttons and Ping.
- On the
internalrow (10.10.1.1), click SSH.
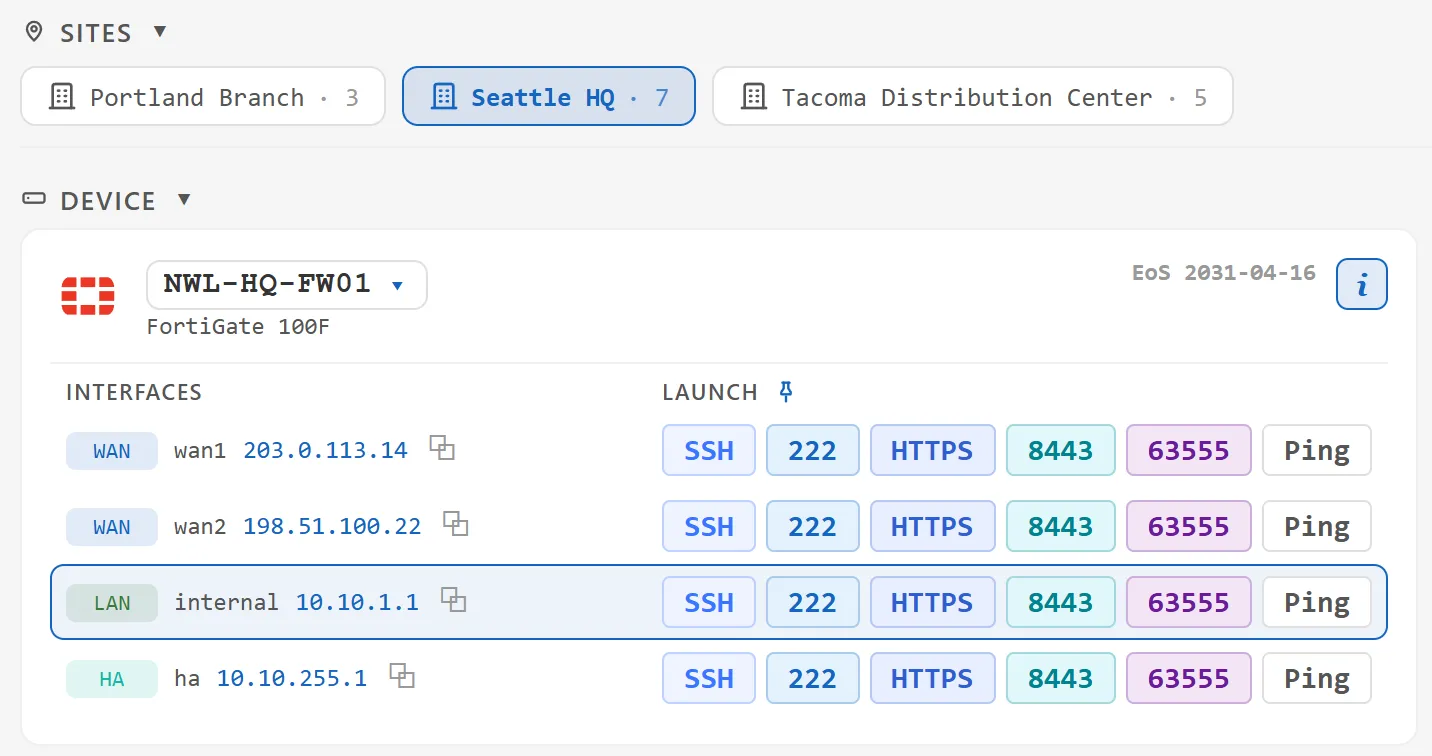
ArkhiNet opens a new terminal tab to 10.10.1.1 on port 22. The first time you connect to a device, PuTTY asks you to confirm its host key. Then log in inside the terminal as usual.
ArkhiNet never stores passwords or keys. If you want to skip the “login as:” prompt, you can save a username for a device on this computer, along with the path to a PuTTY .ppk key file. Neither is saved in the shared data file. See Set connection options on this computer.
Other ways to connect to the same device:
- HTTPS opens the device’s web interface in your default browser.
- Ping opens a continuous ping in a pane.
- Double-click the device in the sidebar (or select it and press Enter) to connect to its active interface with its first SSH Launch Button.
- Right-click the device in the sidebar for CONNECT VIA: pick any interface, then a Launch Button. For a FortiGate, HTTPS on port 443 from this menu opens the
/loginpage directly.
For a FortiGate model, the device card also shows its Fortinet End of Support date.
Where to go next
Section titled “Where to go next”- Change which buttons appear, and on which ports, in Launch Buttons.
- Already have sessions in PuTTY, SecureCRT or a spreadsheet? Import them instead of typing them in.
- Get your bearings in the interface tour.