Interfaces and IP addresses
A device can have as many interfaces as you need: WAN links, the LAN gateway, an out-of-band management address, the HA heartbeat. Each interface is a row with a name, an address and a role, and every row gets its own Launch Buttons on the Connect tab.
Add or edit interfaces
Section titled “Add or edit interfaces”- Right-click the device in the sidebar and choose Edit (or New device on a site to start a new one).
- Find the INTERFACE/IP section. Each row has three fields:
- NAME: a short label such as
wan1,internal,mgmtorport10. - IP / HOSTNAME: an IPv4 address such as
10.10.1.1, or a hostname or FQDN such asfw01.example.net. - ROLE: WAN, LAN, DMZ, MGMT, HA, Loopback or Other.
- NAME: a short label such as
- Click + Add IP for another row. Click ✕ at the end of a row to remove it.
- Click Save Device.
A new device starts with three rows (wan1, wan2 and internal), ready to fill in or delete. The last row can’t be removed, so a device always has at least one.
An address that isn’t a valid IPv4 address or hostname is outlined in red with Invalid IP / hostname, and you can’t save until it’s fixed. Hostnames can use letters, digits, dots, hyphens and underscores.
Interfaces without an address
Section titled “Interfaces without an address”You can leave IP / HOSTNAME blank to record a port that has no management address, such as switch ports port10 and port11 on a FortiSwitch. Rows without an address are kept in the record but left out of the Connect tab, the sidebar tree and the right-click menu, since there is nothing to connect to.
Where interfaces show up
Section titled “Where interfaces show up”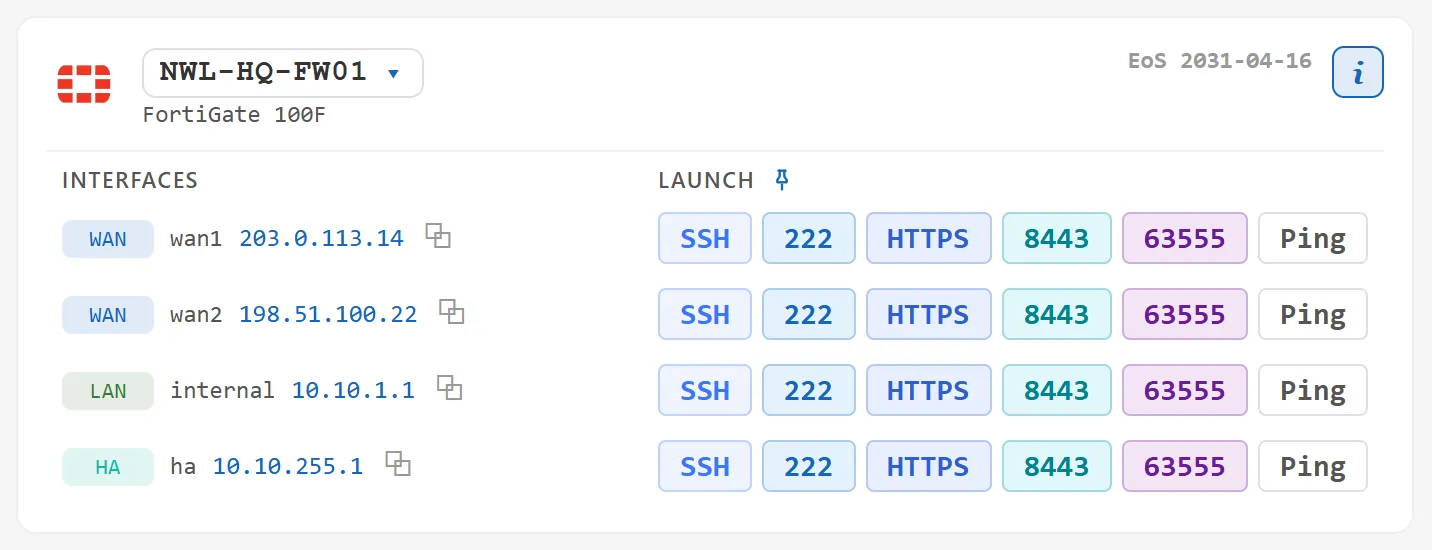
- Connect tab: the device card lists each interface under INTERFACES with a colored role tag (
WAN,LAN,DMZ,MGMT,HA,LOfor loopback,OTHER), its name and its address. The LAUNCH column beside it holds the Launch Buttons and Ping for that address. - Sidebar tree: click ▶ next to a device to list its interfaces. Double-click an interface, or select it and press Enter, to connect to that address.
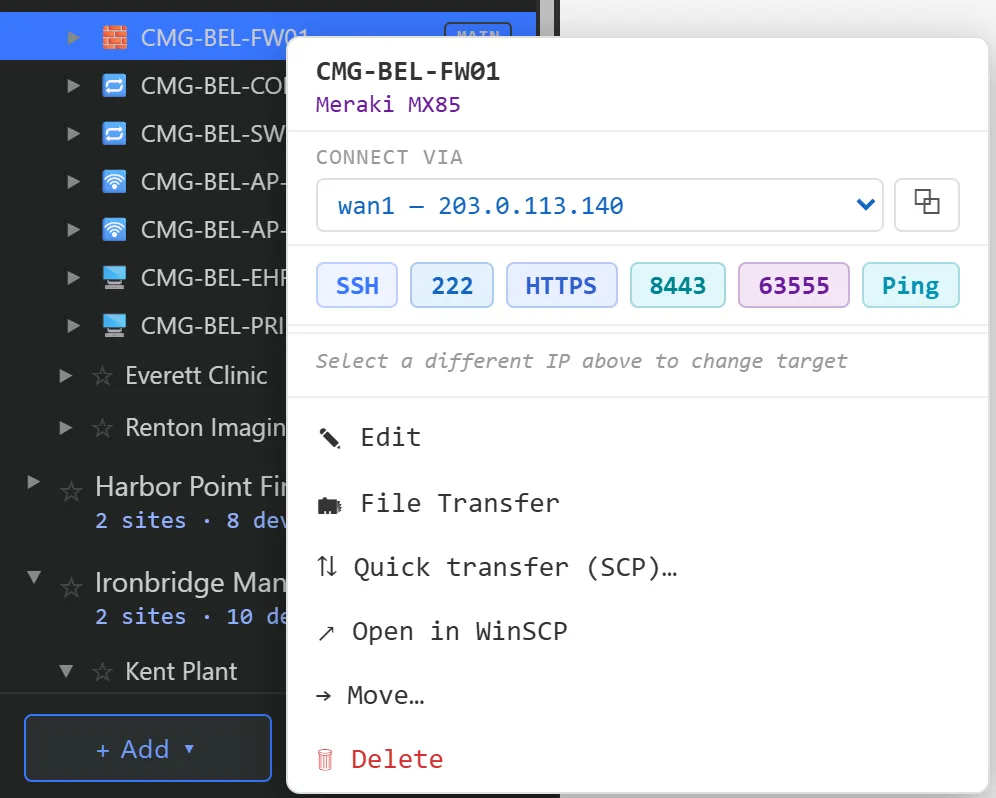
- Right-click menu: with more than one address, CONNECT VIA is a dropdown. Pick an interface there and the Launch Buttons in the menu use it.
- Search: interface names and addresses are searchable. Typing an interface name such as
port1alongside a device name targets that interface. See Global search.
The active IP
Section titled “The active IP”Each device remembers one interface as its active IP. It’s what ArkhiNet uses when you connect to the device as a whole, for example by double-clicking it in the tree or pressing Enter on a search result.
You don’t set the active IP in the editor. ArkhiNet updates it as you work: connecting through a particular interface from the Connect tab, the tree or search makes that interface the active IP, so the next device-level connect goes to the one you used last. If the active interface has no address, the first interface that has one is used instead.
Copy an address
Section titled “Copy an address”Every place that shows an address has a ⧉ copy button:
- On the Connect tab, ⧉ sits at the end of each interface row.
- In the right-click menu, ⧉ sits next to the CONNECT VIA box and copies the address selected there.
The button turns into ✓ for a moment to confirm the copy. Copying only happens when you click; ArkhiNet never puts an address on the clipboard by itself.