
Projects, tasks and notes
Each client has a Projects tab for work in flight, such as a firmware rollout or a Wi-Fi refresh, and a Notes tab for the things you’d otherwise keep in a separate document: contacts, contracts, change windows. Sites and devices have their own notes in their editors. All of it lives in the shared data file, so everyone who opens the file sees the same projects and notes.
Both tabs are on the Home tab (⌂), next to Connect and Topology, and they belong to the client you have selected in the sidebar.
Create a project
Section titled “Create a project”- Select the client in the sidebar, for example Northwind Logistics.
- On the Home tab, click Projects.
- Click + New Project.
- Enter the PROJECT NAME, for example
FortiOS 7.4 fleet upgrade, and optionally a TARGET DATE. - Click Create Project, or press Enter.
Add and complete tasks
Section titled “Add and complete tasks”- In the project card, click + Add task.
- Type the task, for example
Upgrade Tacoma FG60F, and optionally pick a due date. - Click Add, or press Enter.
- Click the checkbox next to a task when it’s done. Click it again to reopen the task.
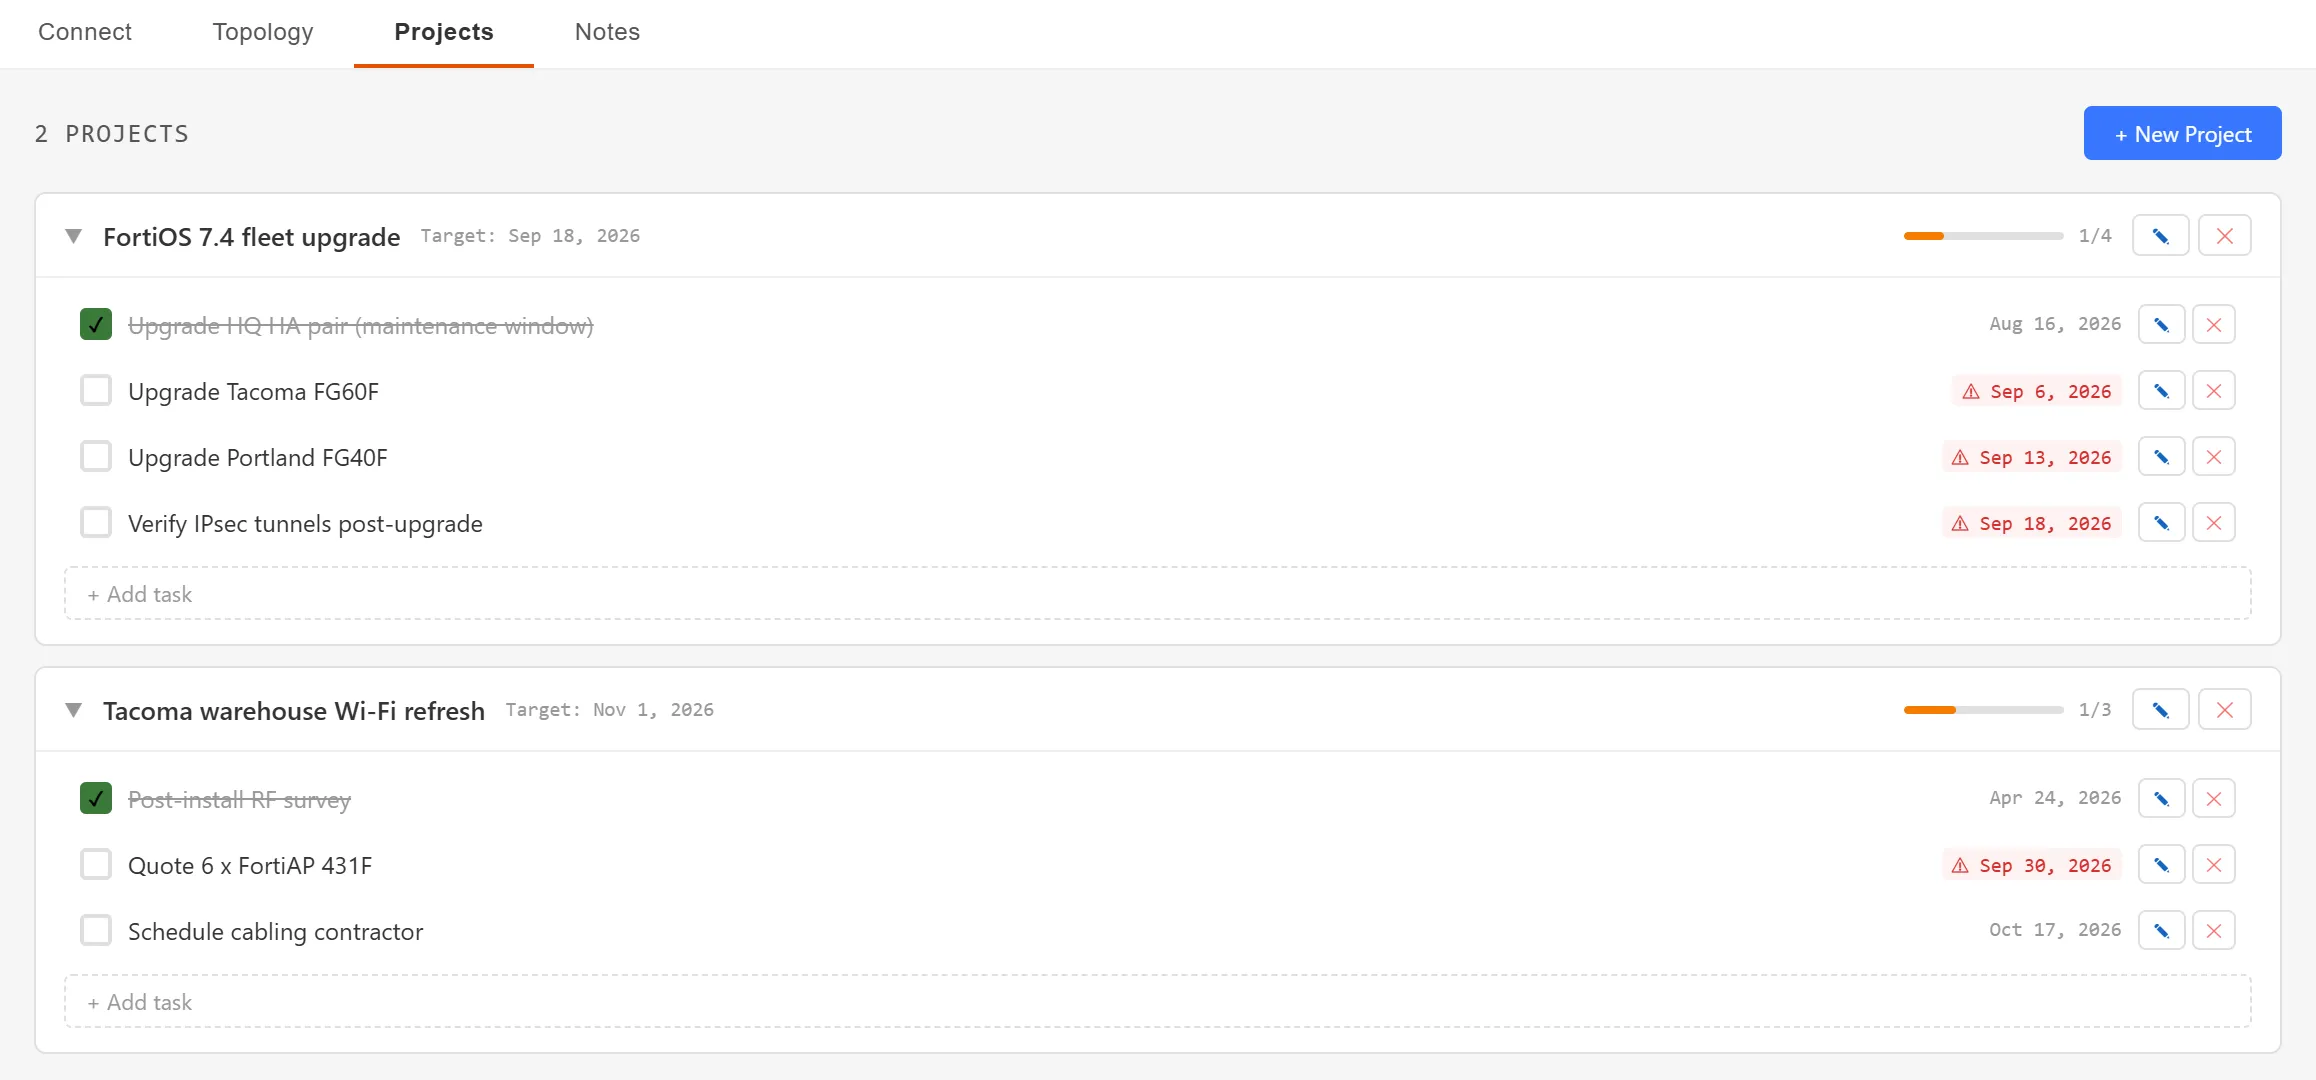
Done tasks are struck through. A task that’s past its due date and not done shows its date in red with a ⚠ warning.
To change a task, click ✎ at the end of its row, edit the text or date, then click Save. Click ✕ to delete a task; there’s no confirmation for single tasks.
Track progress
Section titled “Track progress”Each project card shows its target date and a progress bar with a count such as 1/4. The bar is amber below half done, blue from half, and green when every task is complete.
Click the ▼ caret or the project name to collapse or expand a card. Click ✎ on the card header to rename the project or change its target date.
When every task in a project is done, the project moves down into COMPLETED PROJECTS, collapsed. Reopen any task and it moves back up. The line at the top of the tab counts all projects and how many are complete.
Client notes
Section titled “Client notes”- Select the client in the sidebar.
- On the Home tab, click Notes.
- Type. Notes save automatically as you type; there’s no Save button.
The Notes tab and the NOTES / PROJECT INFO field in the client editor are the same text, so you can edit it in either place.
Site notes
Section titled “Site notes”Site notes are for what’s specific to one location: address, circuit IDs, onsite contacts, rack locations.
- Right-click the site in the sidebar and choose Edit.
- Type in SITE NOTES.
- Click Save Site.
If the client has only one site and the site level is hidden, right-click the client and choose Edit site “name”… instead. See Hide single sites.
Site notes can be included in the PDF inventory report with the Include site notes option when you export it.
Device notes
Section titled “Device notes”Each device has its own NOTES field in the device editor, for HA roles, VDOM layout, ISP details or rack position. Device notes are searchable with Ctrl+G (see Search the inventory).
Hide Projects or Notes
Section titled “Hide Projects or Notes”If you don’t use them, turn off Projects or Notes in Settings → Features. The tabs disappear on your PC only, and the data stays in the file. See Show or hide features.